- Created : 01/08/2023
- Support Email : support@pixelnx.com
Introduction
PixaURL - Organize your social handles in Just a single tap.
PixaURL - Introducing PixaURL, the platform that consolidates and simplifies all your social links. Streamline your online presence and enhance productivity with our smart link solution.
PixaURL is a user-friendly portfolio editor tool built with the power of React JS technology. This tool is packed with over 20 pre-designed templates, and many more. Its simplicity and ease of use will enhance your editing experience and make your work an absolute pleasure.
PixaURL allows you to create a custom, personalized page that stores all the prominent links you wish to share with your viewers.
PixaURL provides a single location to concentrate your follower’s attention on your every social media account. The creative templates available allow you to customize your profile, giving it a unique touch that represents your personality or brand. You can edit the content and add the links to your website or social media handles. It helps you keep in touch with your followers/subscribers for longer.
The editor comes with the admin dashboard contains various settings to manage and regulate the functionalities. Additionally, the admin has the ability to add new users, enhancing collaboration and teamwork.
Create Your Own Portfolio in Just a Single Tap with PixaURL. Experience the convenience and creativity this tool has to offer, and take your online presence to new heights with PixaURL.
Demo Login Details
Admin Login Details
- URL https://app.pixaurl.com/
- Email : demoadmin@pixaurl.com
- Password : admindemo@123
User Login Details
- URL https://app.pixaurl.com/
- Email : demouser@pixaurl.com
- Password : demouser@123
Script Created Date:
Please check Live Preview:
Creative Author Portfolio:
Features
There are more than enough features squeezed in this script like
Features of the admin
- Dashboard
- Links Analytics
- User Listing
- Users Management
- Templates Management
- Templates Categories Management
- Themes Management
- Social Icons Management
- customize Icons
Features of the App
- Dashboard
- Links Analytics
- Links Management
- Profile Management
- Pre-made Templates
- Customize Templates with your favorite colors
- Associate globally
- Bring in smart wealth
- Share your Ideas with the world
- Device Friendly/Responsive
- User Friendly
- Lightweight

Script Installation
Note
1. Before installing the script please make sure that you have nodejs installed on your server and for Database MongoDB is neccessary.
2. You can check the node version from the terminal/cmd just type node -v.
How To Install Script
Step 1 Extract the (PixaURL)file that you have received from the Codecanyon. Inside that you will get Main File and Code.
Step 2 Open the terminal or Command Line Prompt (cmd) on the system.
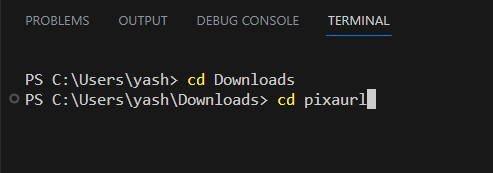
Step 3 Navigate to the folder where you have extracted the file through commands.
3.1 Run Command "Cd Extract_file_location" (PixaURL).
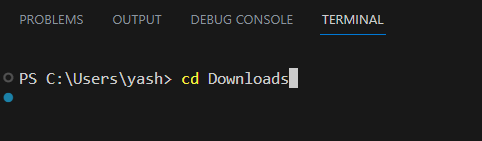
3.2 Run Command "Cd file_name" (PixaURL).
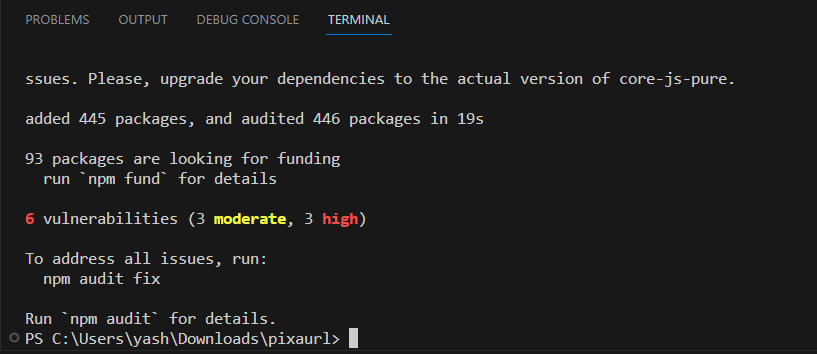
Step 4 Then install npm modules. Run command npm install
Step 5 Run command
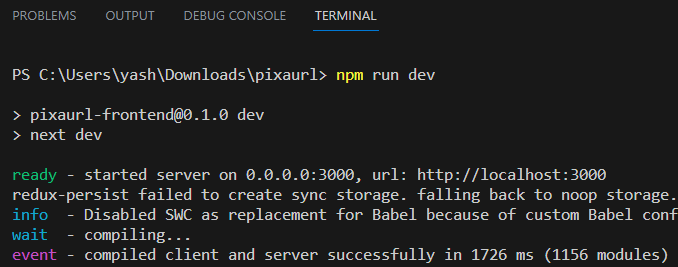
If Setup on local server (localhost)
Step 5.1 Run command npm run dev
If Setup on live server
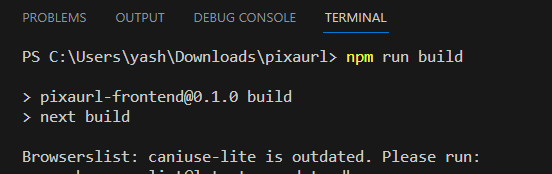
Step 5.1 Run command npm run build
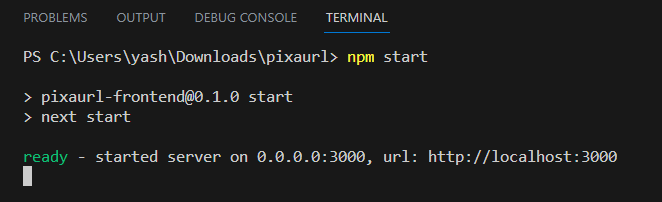
Step 5.2 Run command npm start
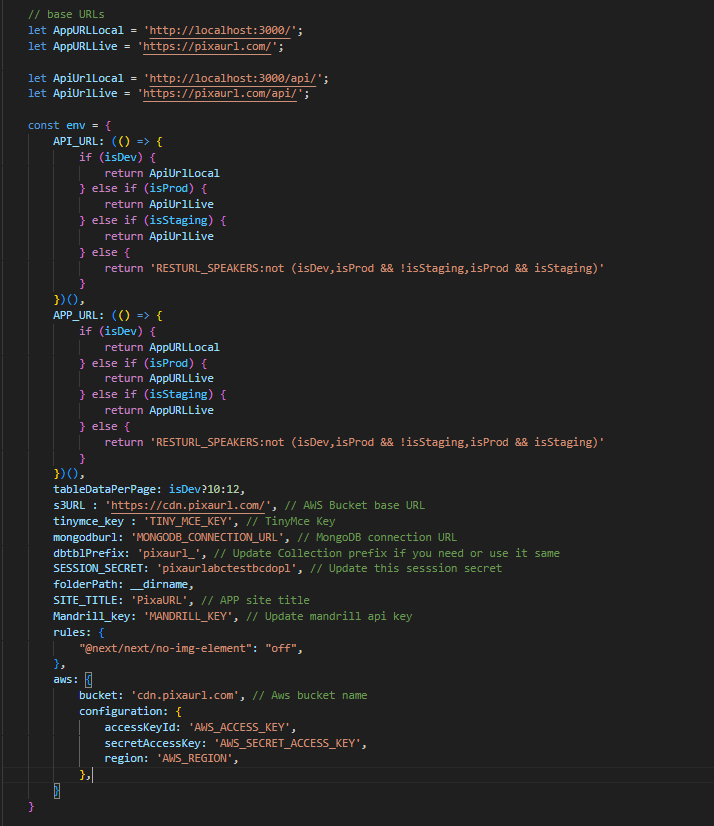
Step 6 Then Navigate to next.config.js file and then update the following mention fields below
AppURLLive : App base URL
ApiUrlLive : Api base URL
s3URL : AWS bucket base URL
tinymce_key : TinyMCE API key
mongodburl : MongoDB connection URL
dbtblPrefix : Database collection prefix
SESSION_SECRET : This will use in the JWT authentication
SITE_TITLE : App Title name
Mandrill_key : Mandrill API key
AWS API Details : bucket name, accessKeyId, secretAccessKey, region
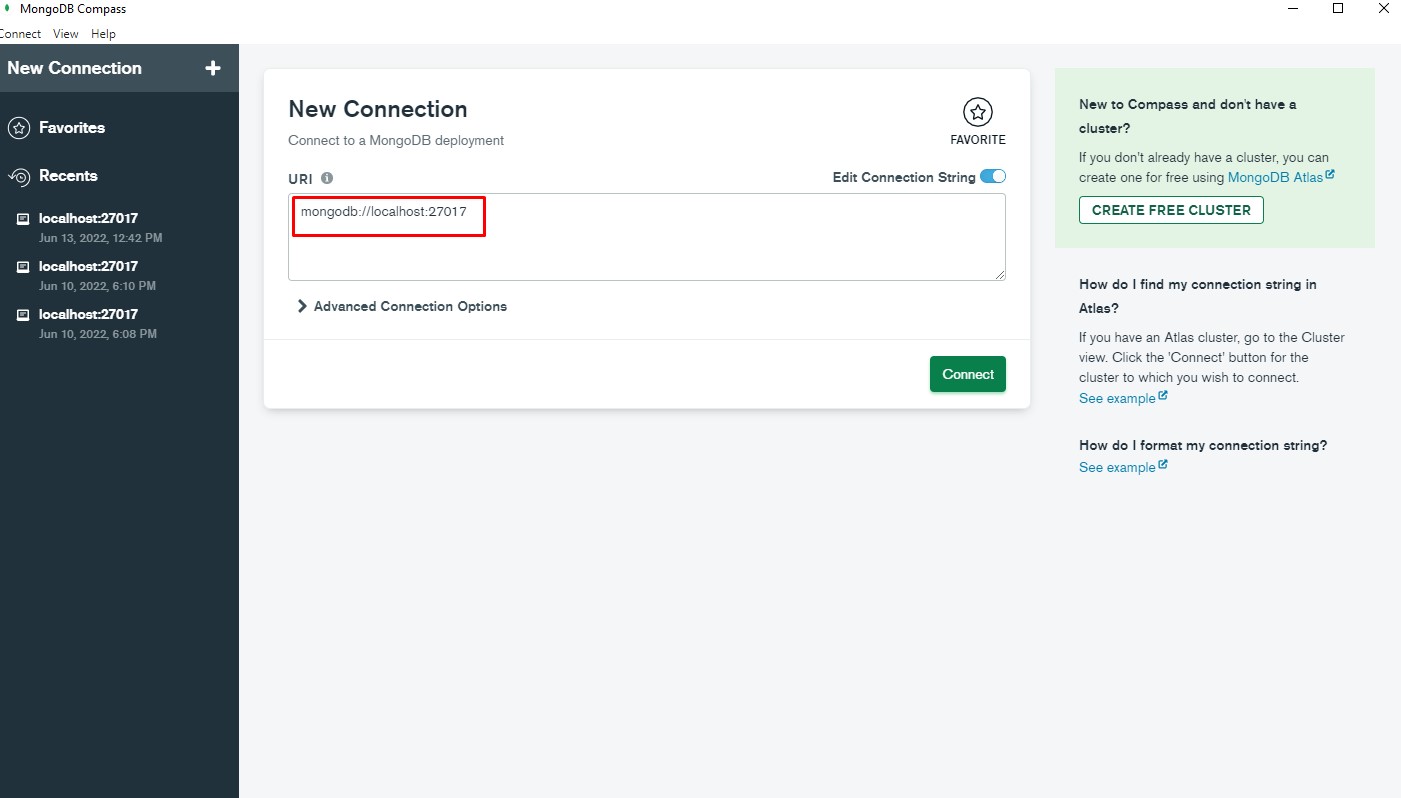
Step 7 After that, open the Mongo DB and paste the "MONGODB_CONNECTION_URL" in the field.
Note: How to MongoDB connection URL Check here .
Step 8 To Import the demo data. Please go to the import section. click here
Demo Import
Note
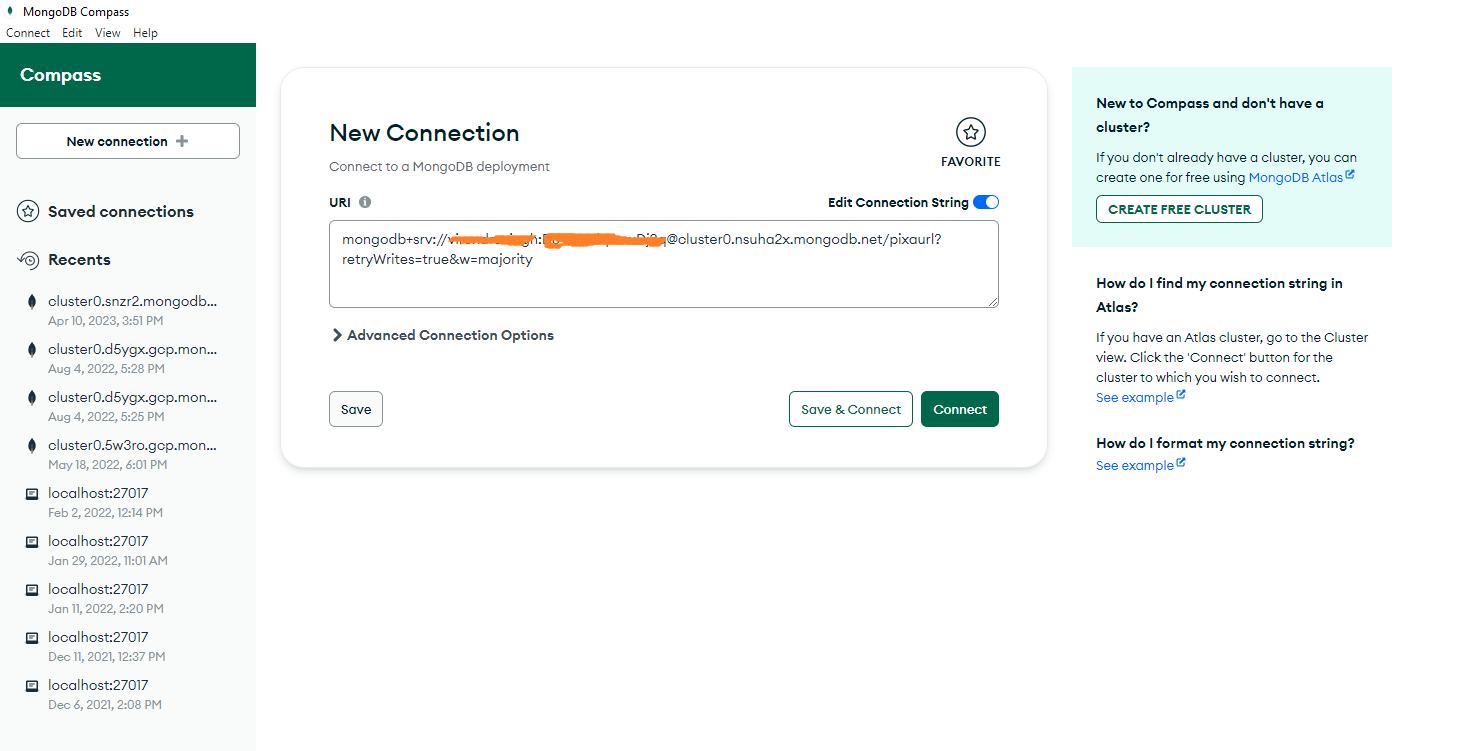
Step 1 : Open Mongodb compass and past Mongodb connection URL, and then connect.
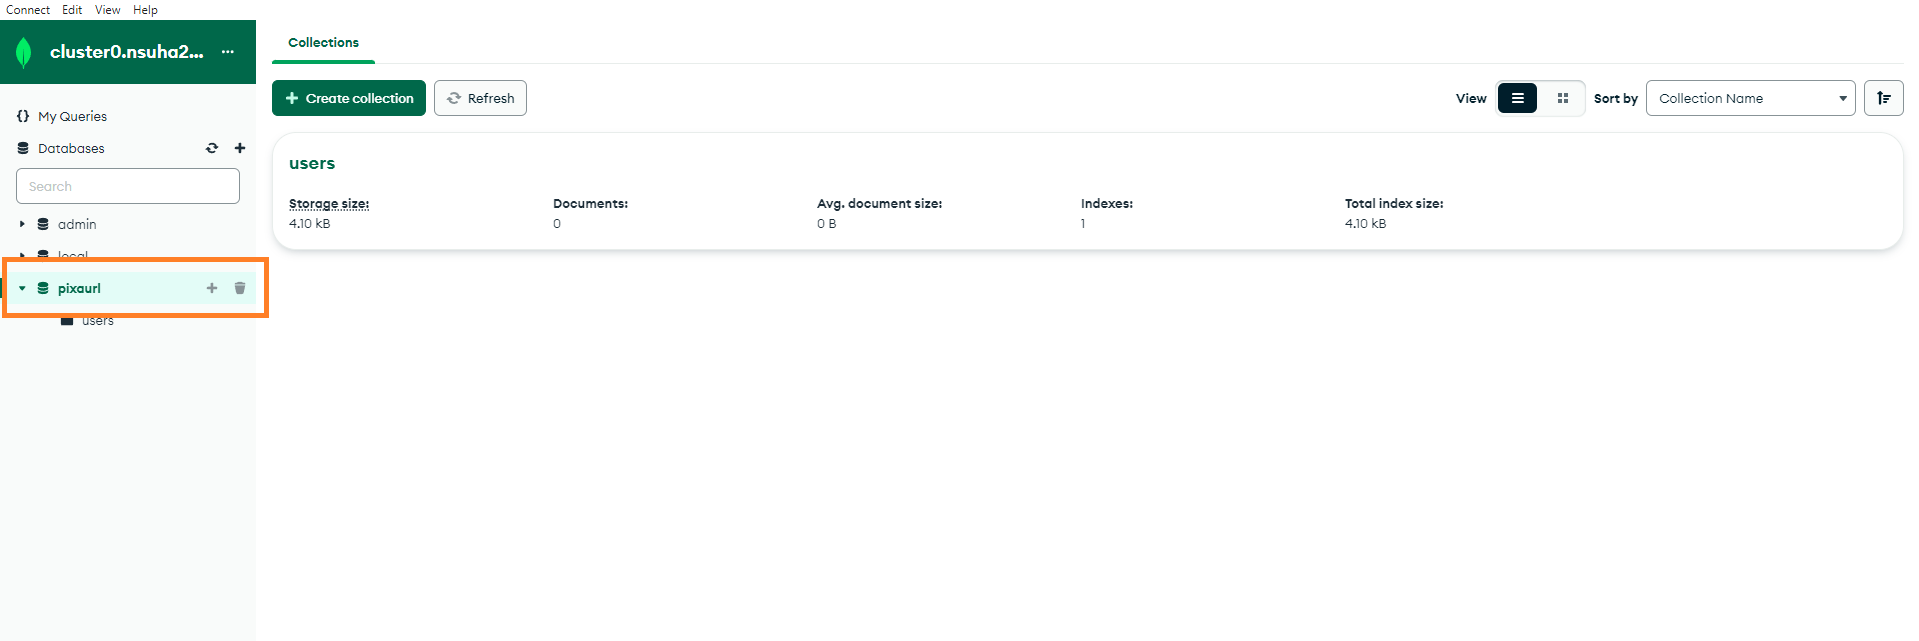
Step 2 : Please click on the database name. In our case is, "pixaurl" shown in the screenshots.
There is initially only one collection (users) in the database. Now we have to create this collection to import data.
1. users (Shown in the screenshot)
2. pixaurl_templates
3. pixaurl_templatepages
4. pixaurl_templatesections
5. pixaurl_templatecategories
6. pixaurl_socialtypes
7. pixaurl_socialpacks
Note : For above three collections "pixaurl_" prefix is used but please match and use the same prefix as you added in the next.config.js file
Note : Do not use any prefix for users collection.
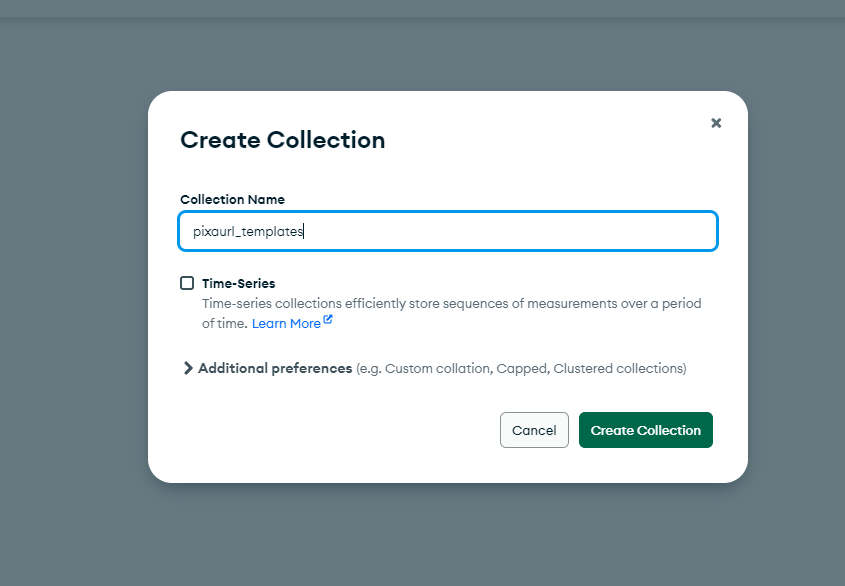
Step 3 : Click on the "Create collection" option.
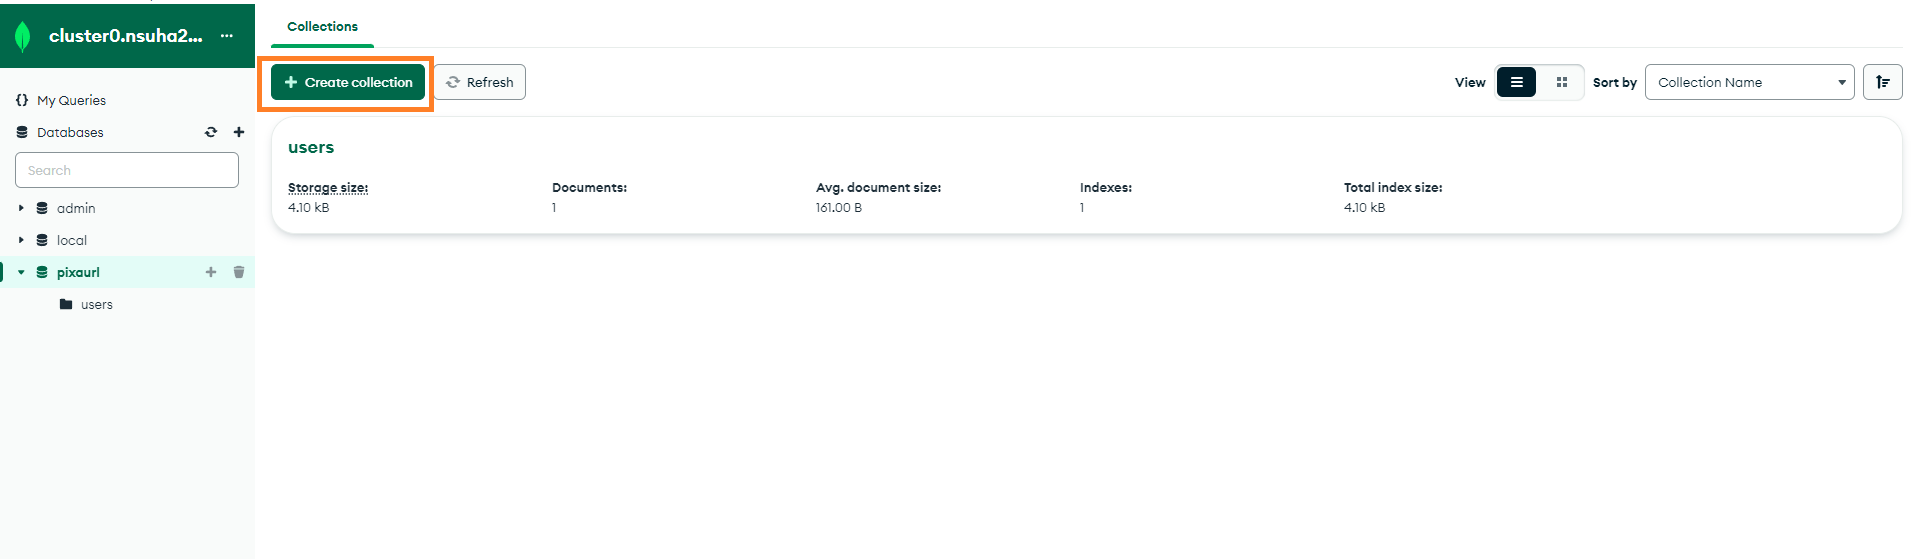
Step 4 : Enter the collection name. then click the "create collection button" .
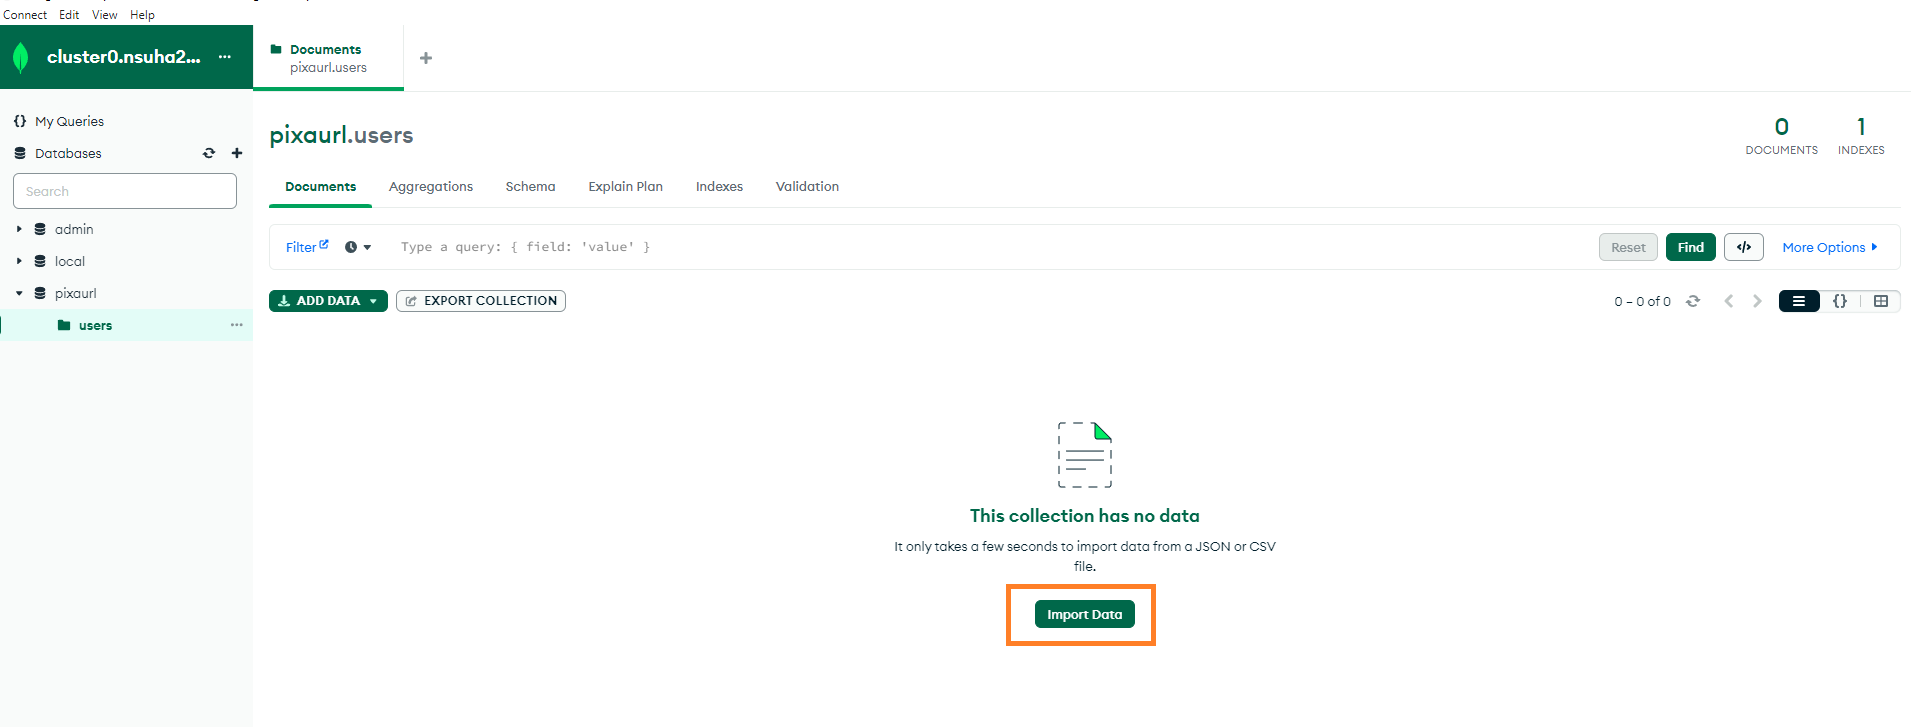
Step 5 : After that click on the "users" collection

Step 6 : Import the user data in the users collection. To download the user.json file click here
Step 7 : Similarly, you have to import the other collection data too.
To import templates collection data. Please. click here
To import templates pages collection data. click here
To import templates section collection data. click here
To import template categories collection data. click here
To import socialtypes collection data. click here
To import social packs data. click here
Step 8 Once the demo data has been imported successfully, then type the domain-name/folder-name/auth/login on browser's address bar, like : https://domain-name.com/folder-name/auth/login and you will get login page of the admin panel. For login use the credentials mentioned below
- Email : demoadmin@gmail.com
- Password : admindemo123
Mongodb Setup
1. How do you get MongoDB connection URL.
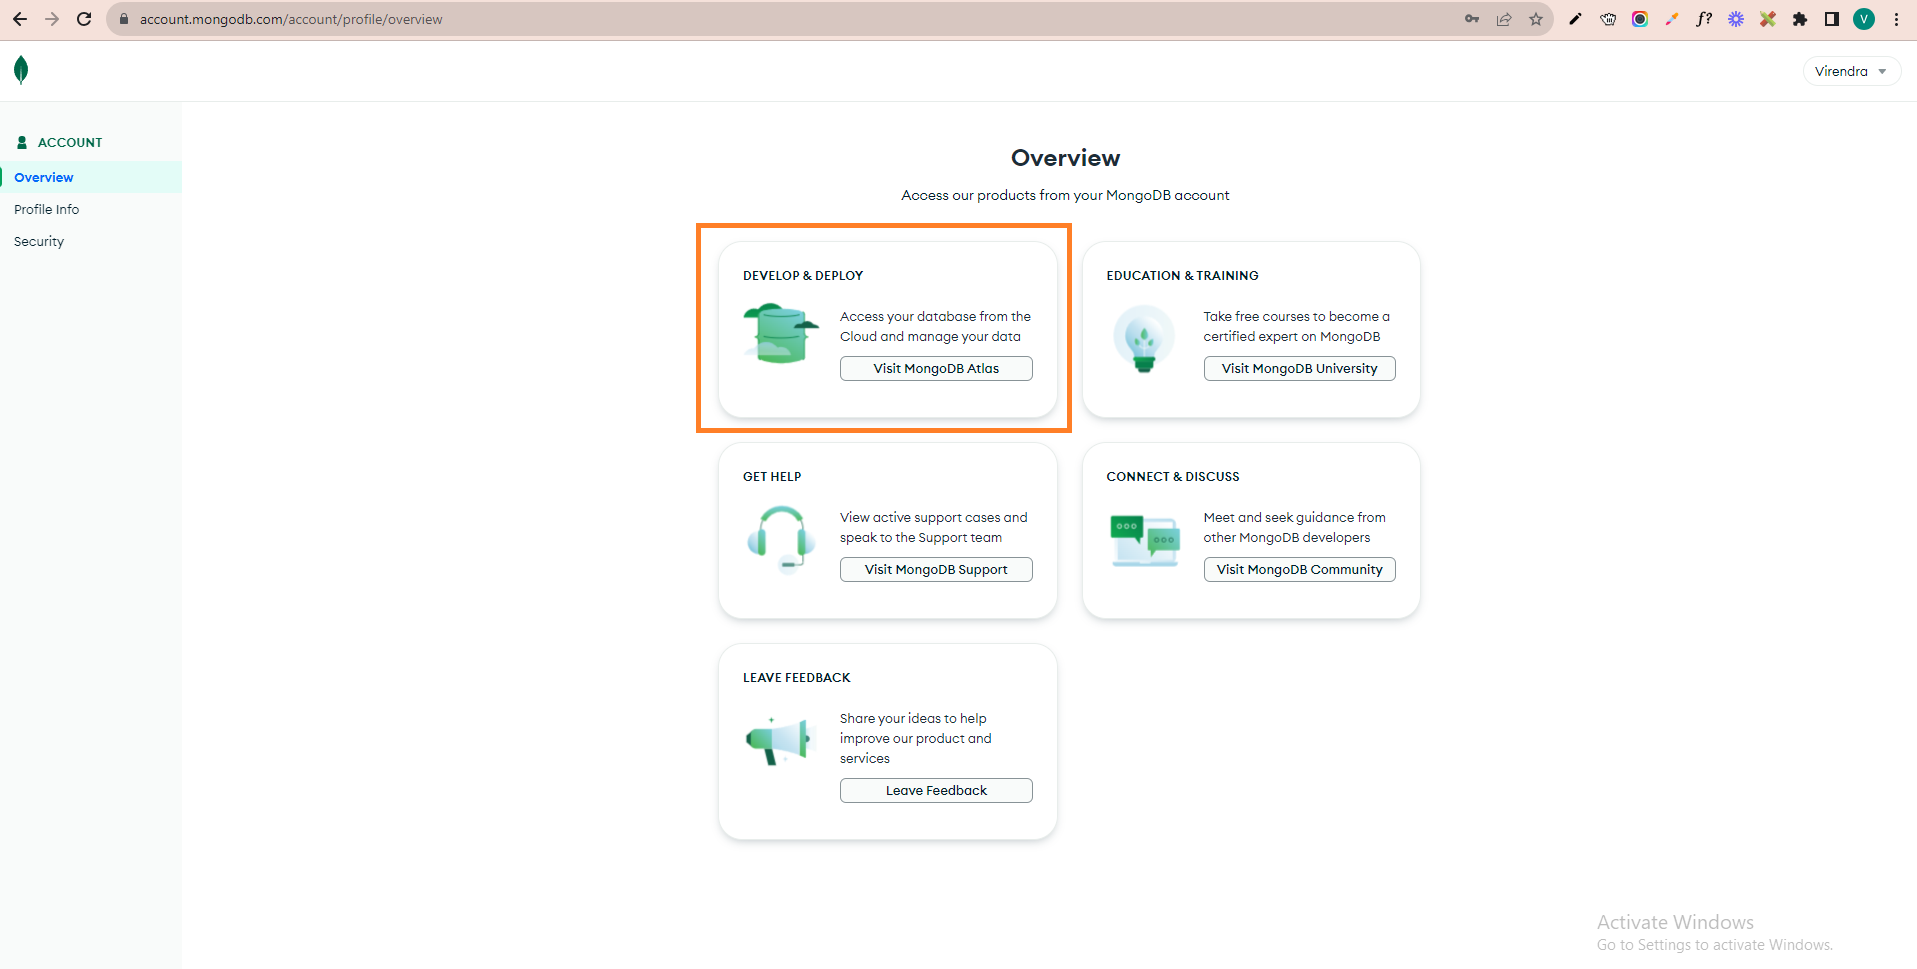
Step 1 : Sign Up in MongoDB, or if you already have an account, then Login.
Step 2 : Login on Mongodb, then you will see the below screen. At this screen, you click on the first "visit MongoDB Altas" option.
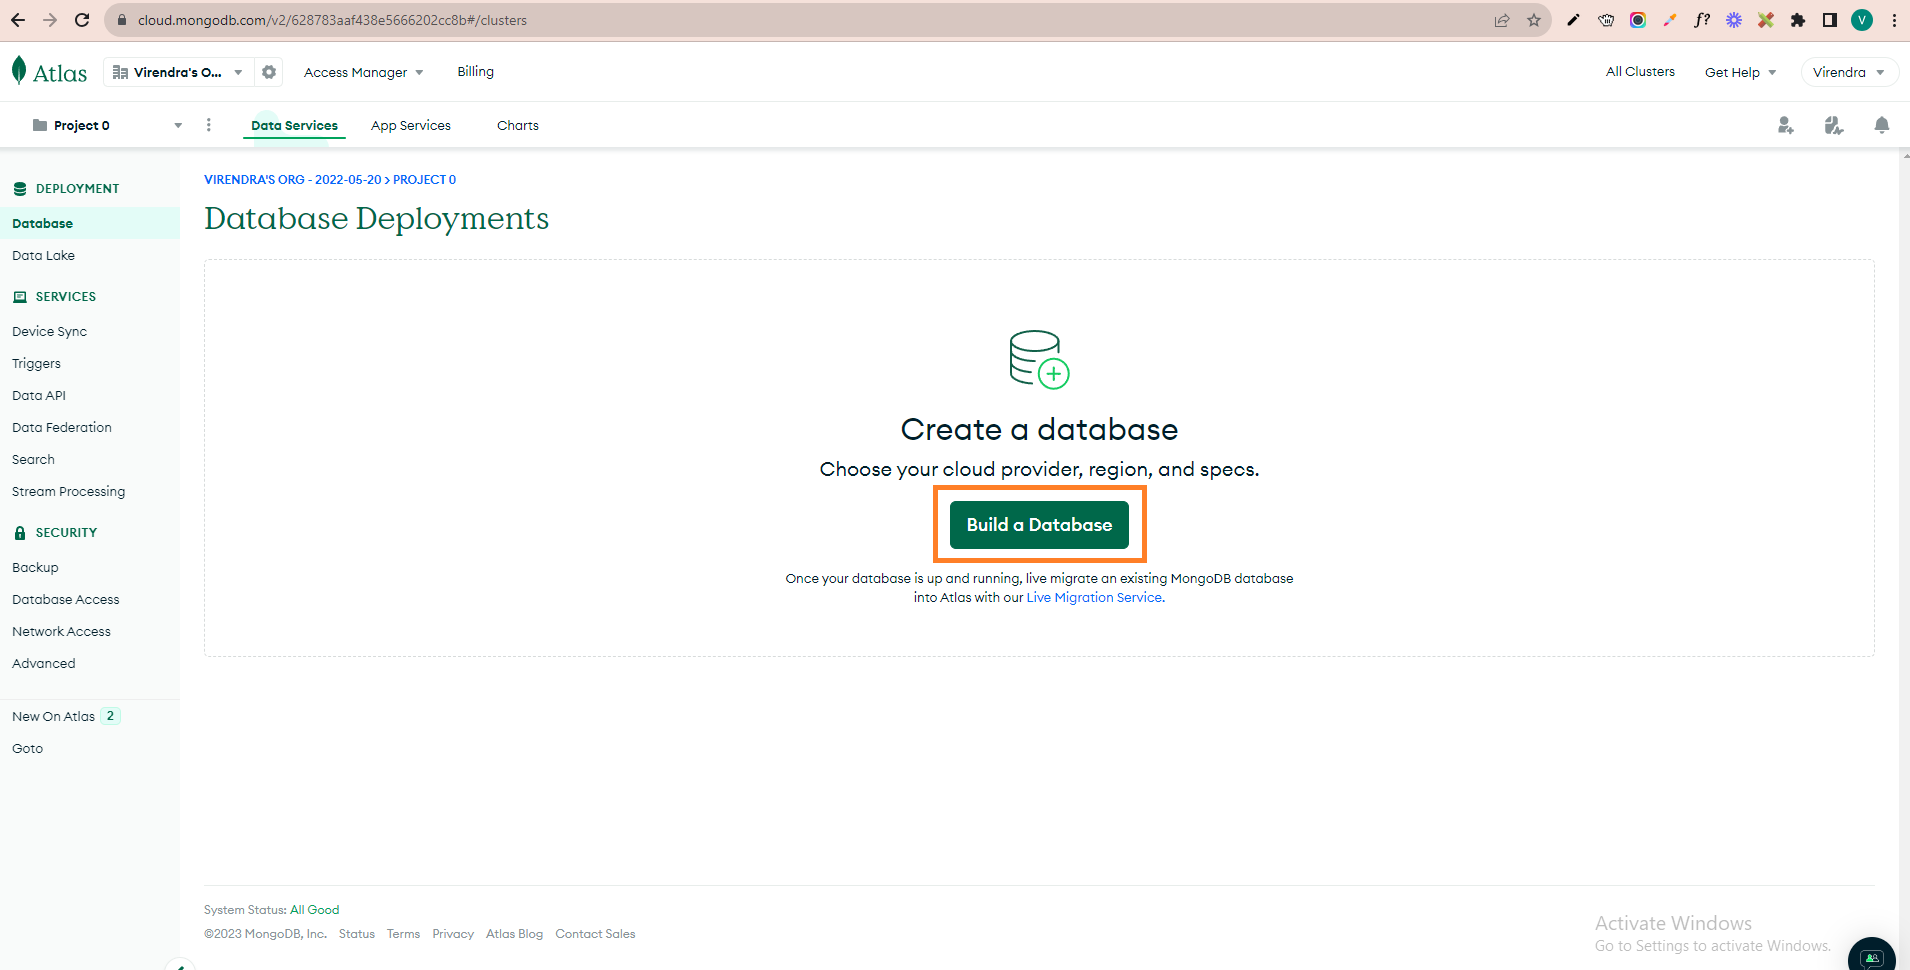
Step 3 : Now at this step, you have to create a database. Please click on "Build a Database," as shown in the screenshot.
Step 4 : After that, select the free plan and click the Create button for the database. (later, you can upgrade your database plan as needed).
Step 5 : Firstly, create a user for the database at this step, update the details and create the user.
Step 6: Once you create a user, you will see this screen.
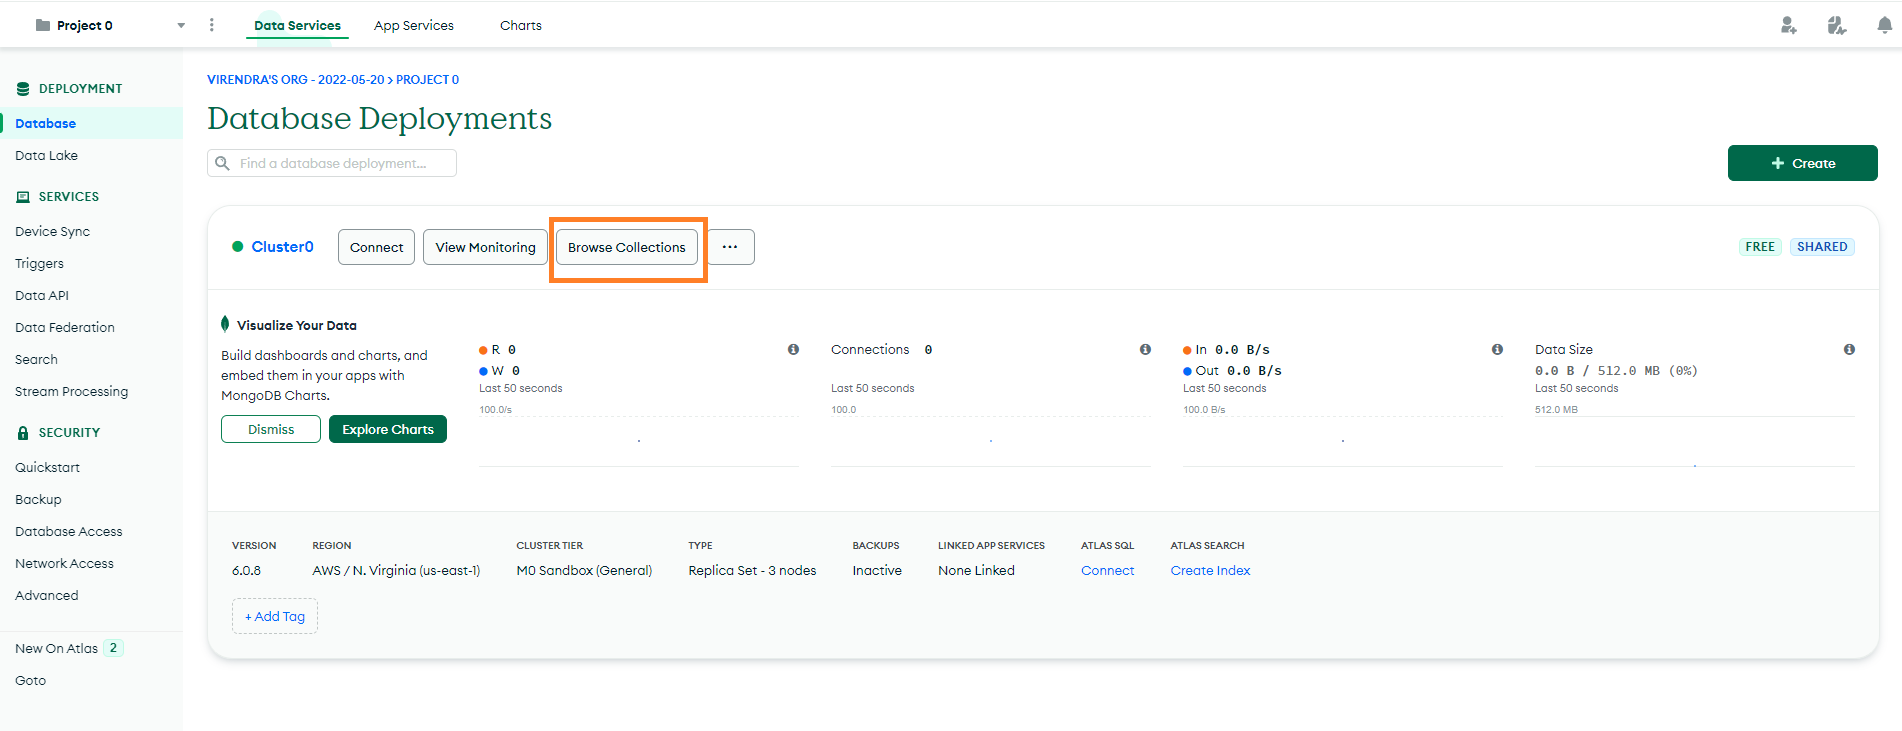
Step 7: Now click on the database showing in the left sidebar. Then click on the "Browse Collections" option.
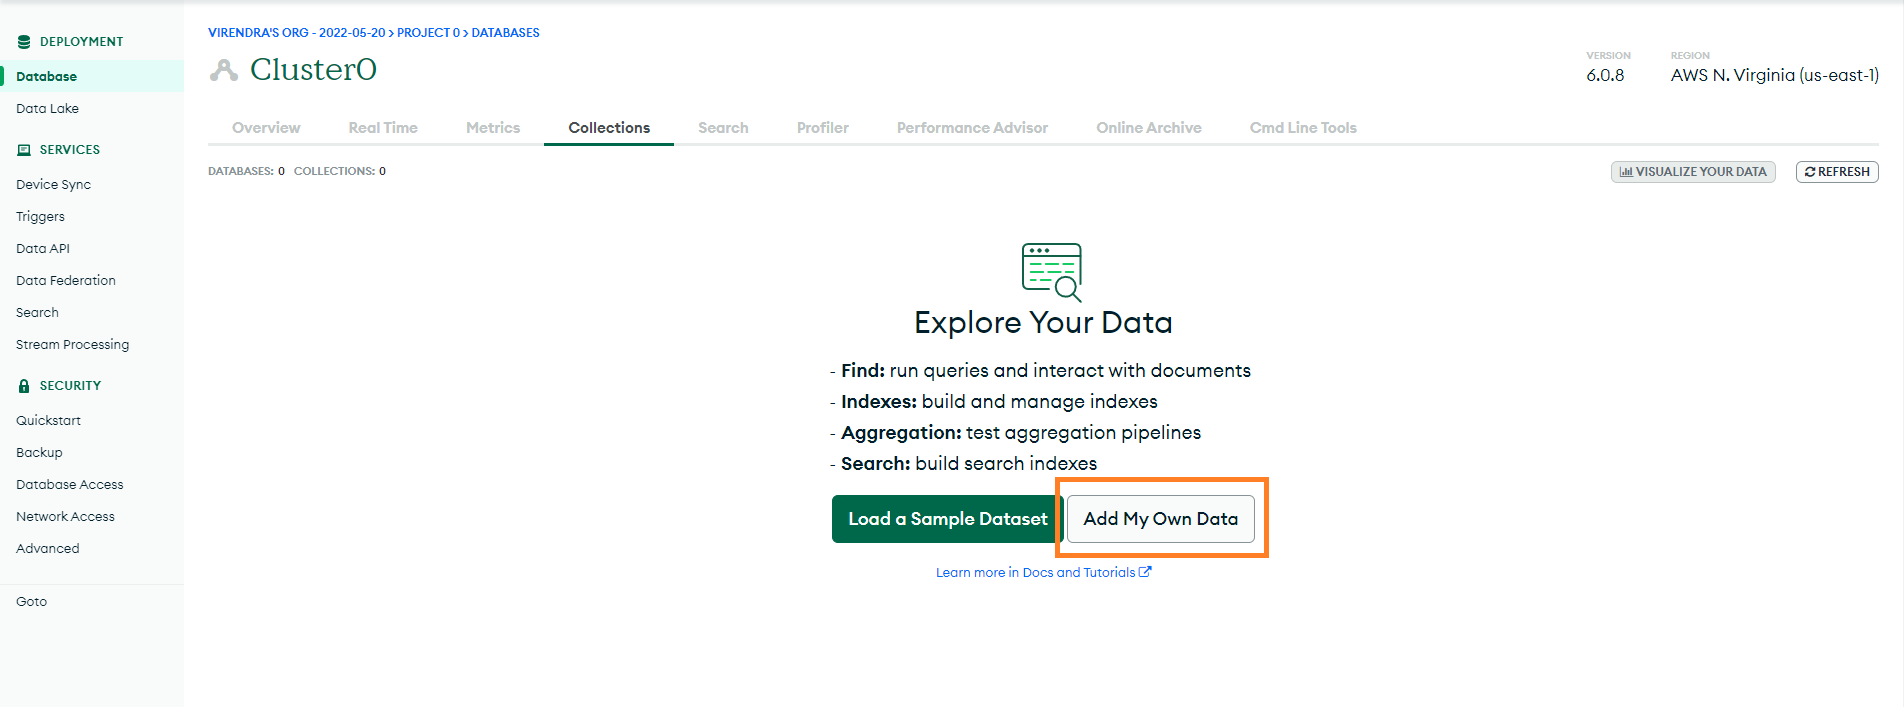
Step 8: Click on the "Add My Own Data" option at this step.
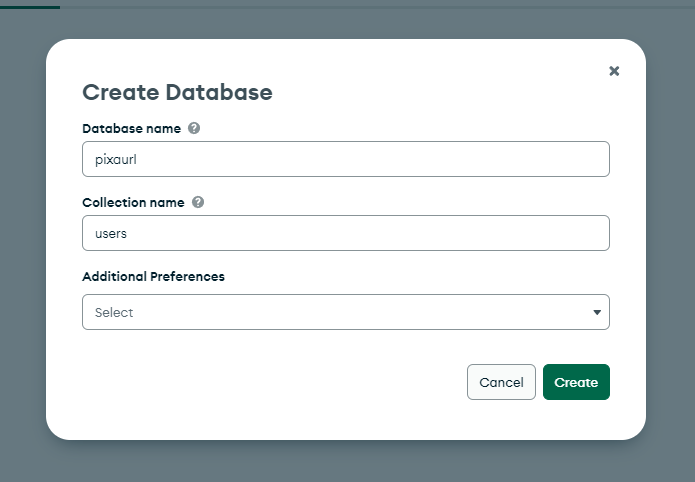
Step 9: Now add your database information.
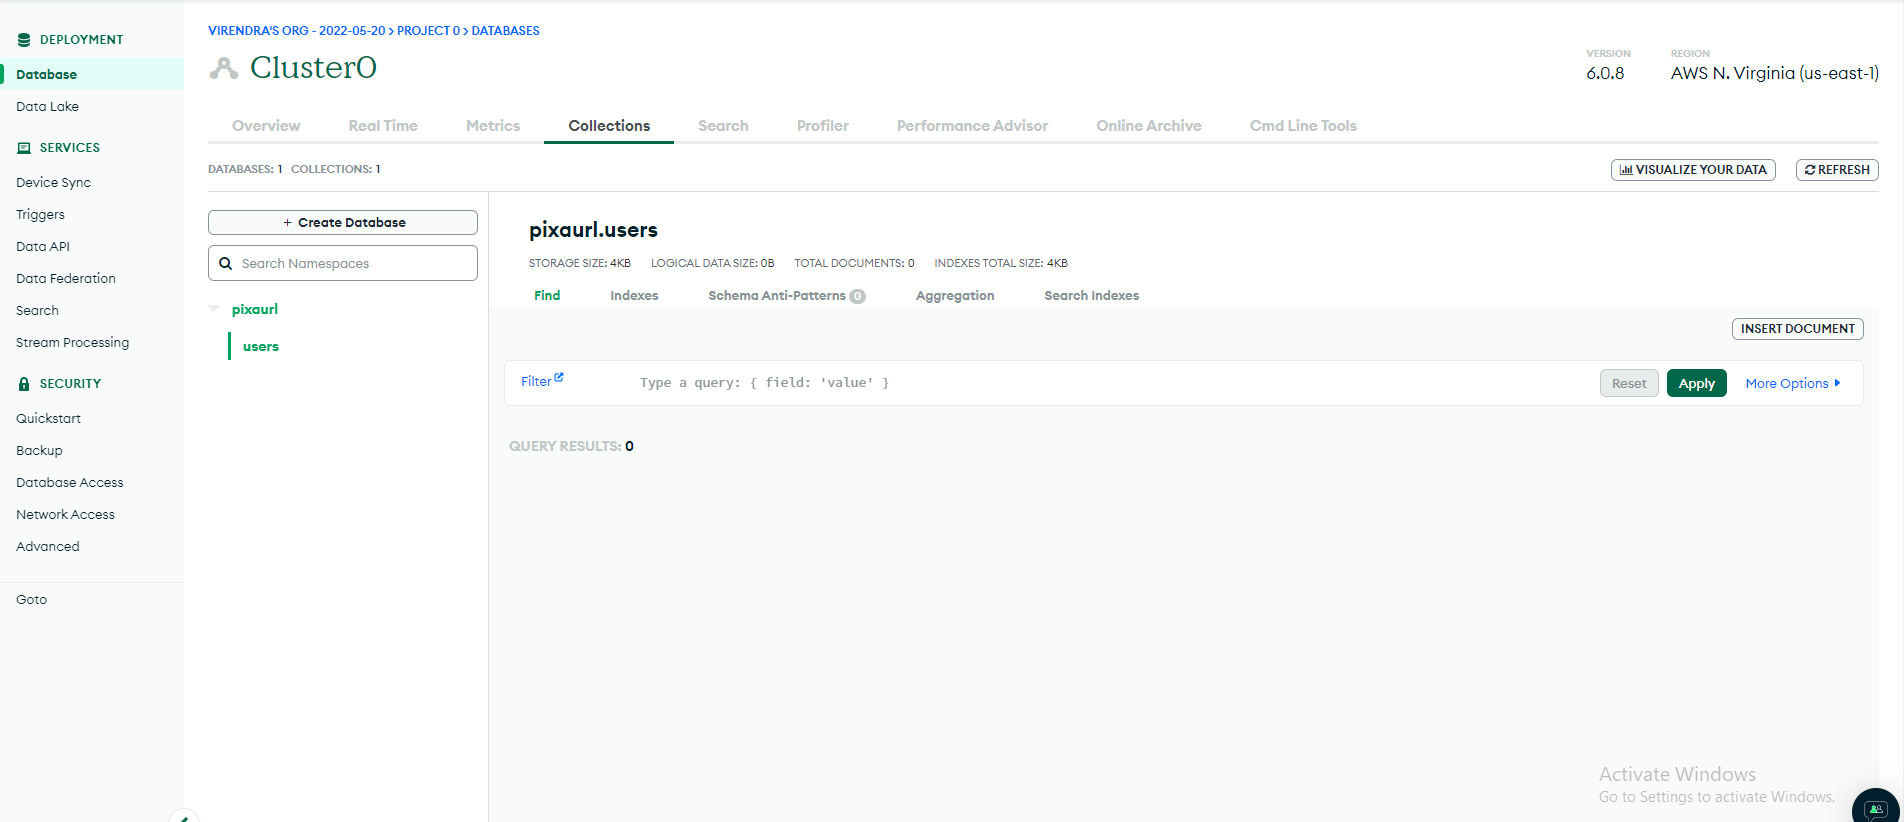
Step 10: Once the database has been created, you will get this screen.
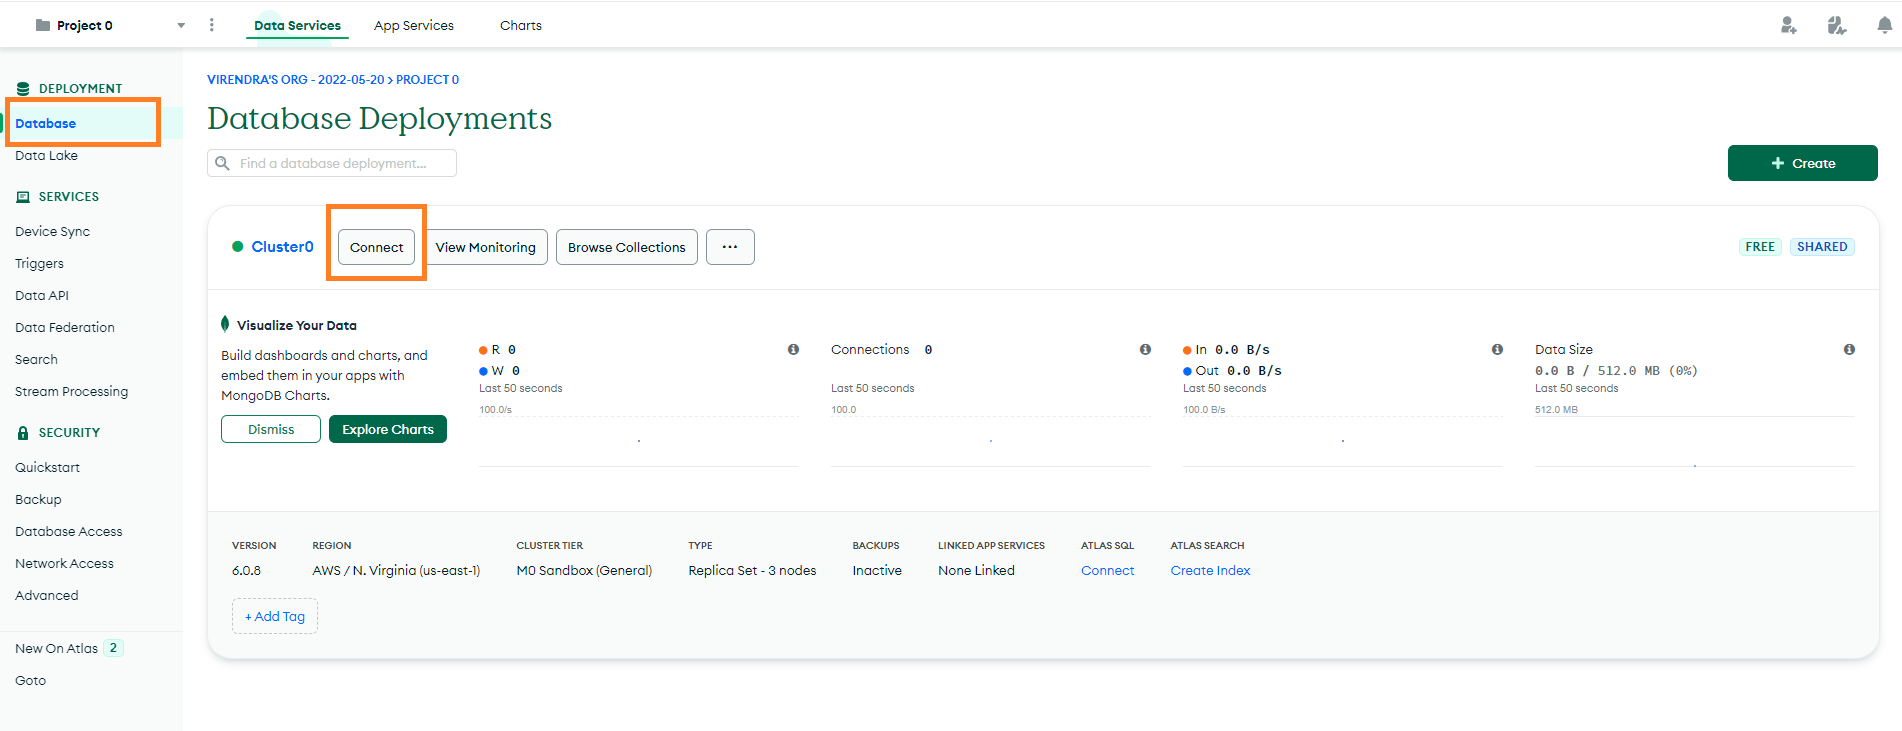
Step 11: Now click on the "database" menu, then click on the "connect" option.
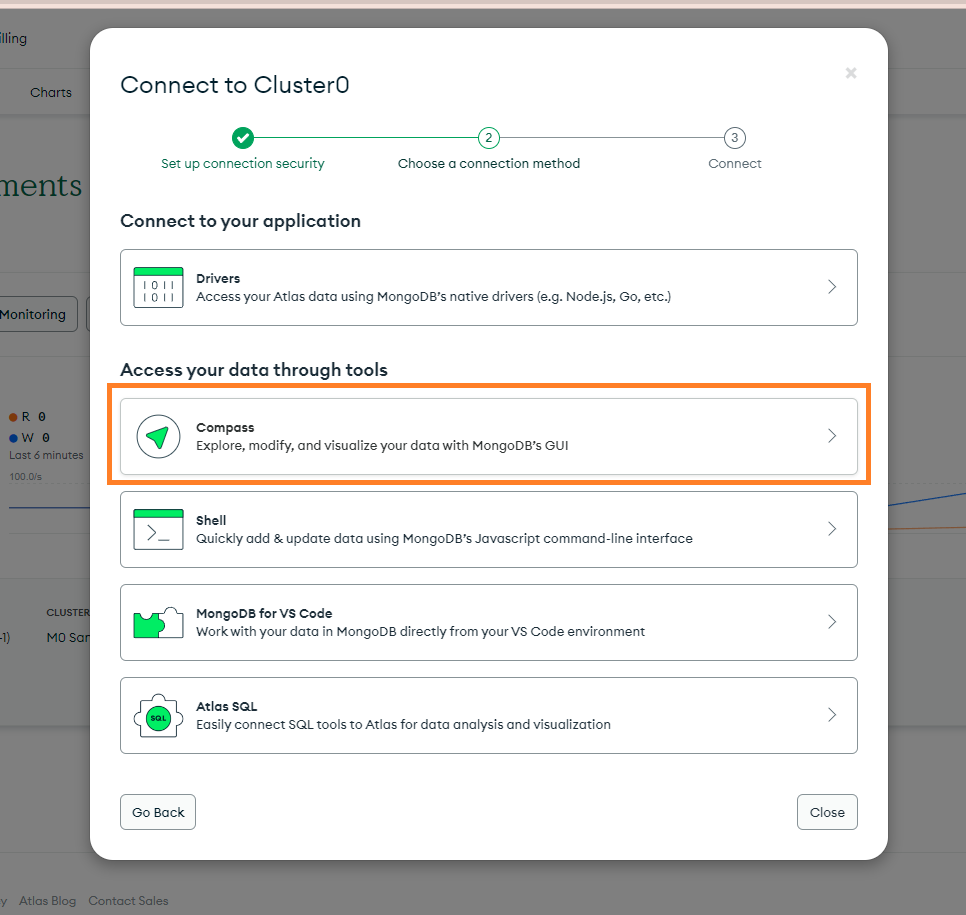
Step 12 : In this model, please click on the compass option.
Step 13 : In this model, you will see the connection URL. Copy this URL.
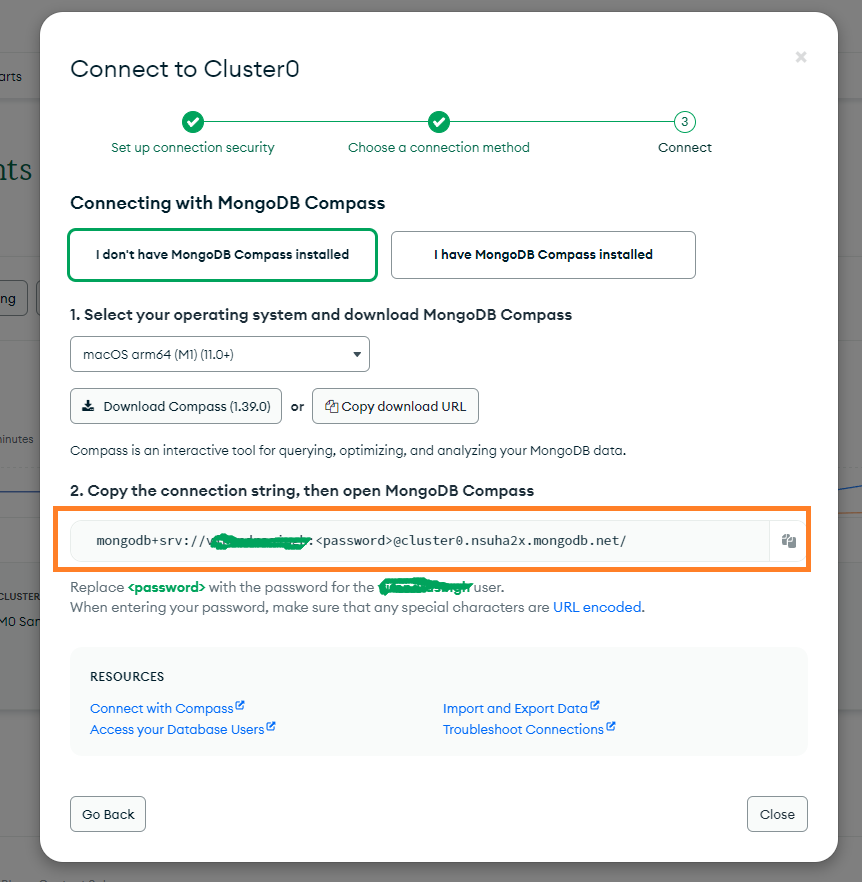
Step 14 : Now you will have your MongoDB connection URL.
| mongodb+srv://pixaurl:<password>@cluster0.nsuha2x.mongodb.net/ |
In this URL you have to add your username, password, and database name.
For Example :
Username = pixaurl, password = pixausertest123, Database name : = pixaurl
The final MongoDB connection URL will be like this (Please update the correct details in this connection URL).
| mongodb+srv://pixaurl:pixausertest123@cluster0.nsuha2x.mongodb.net/pixaurl?retryWrites=true&w=majority |
You have to add the MongoDB connection URL to the next.confiq.js file.
Now click here to import pre-made templates
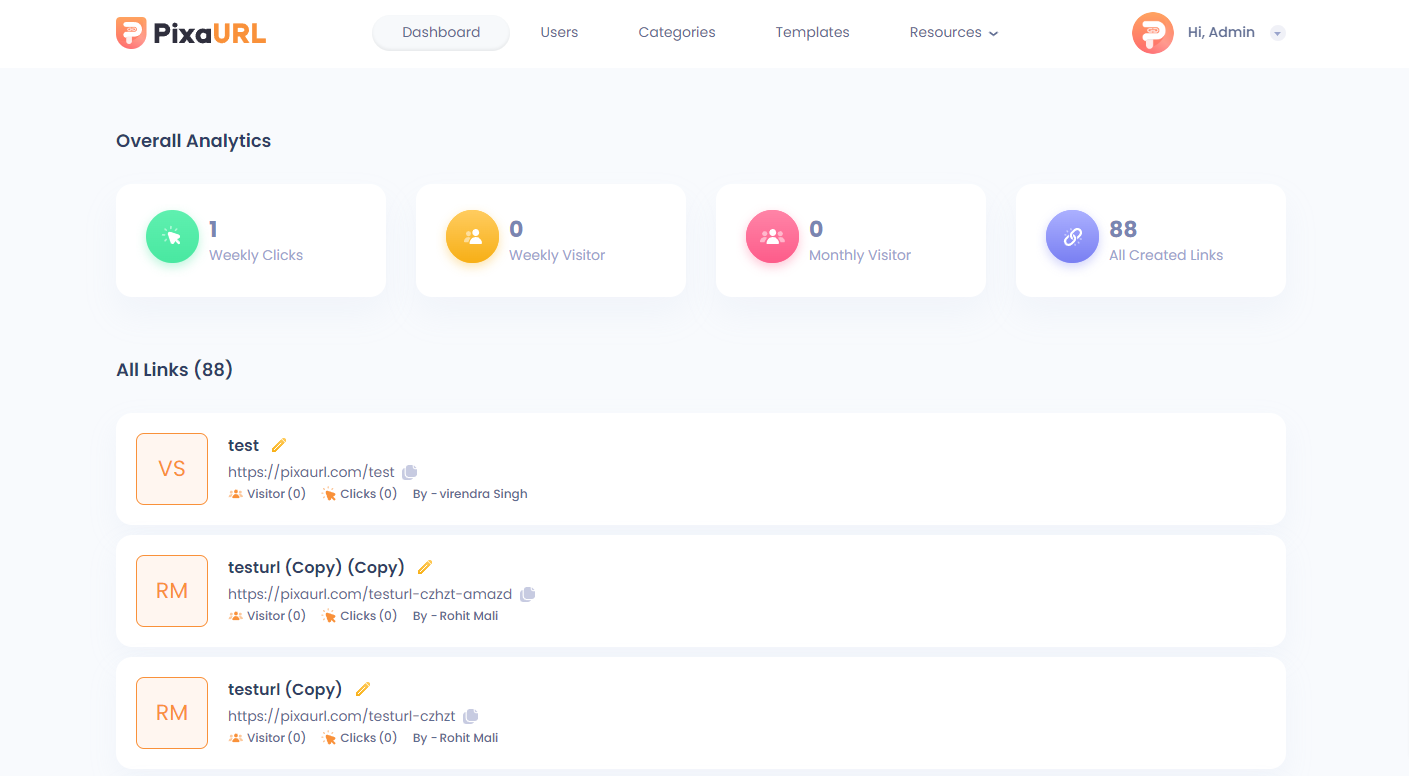
Admin Dashboard
Admin Dashboard comes with the various backend settings to manage the platform.
DashBoard
Admin dashboard settings contain the counts of Weekly Clicks, Weekly Visitor, Monthly Visitor, and All Created Links. With this, you can check the Total of All links created.
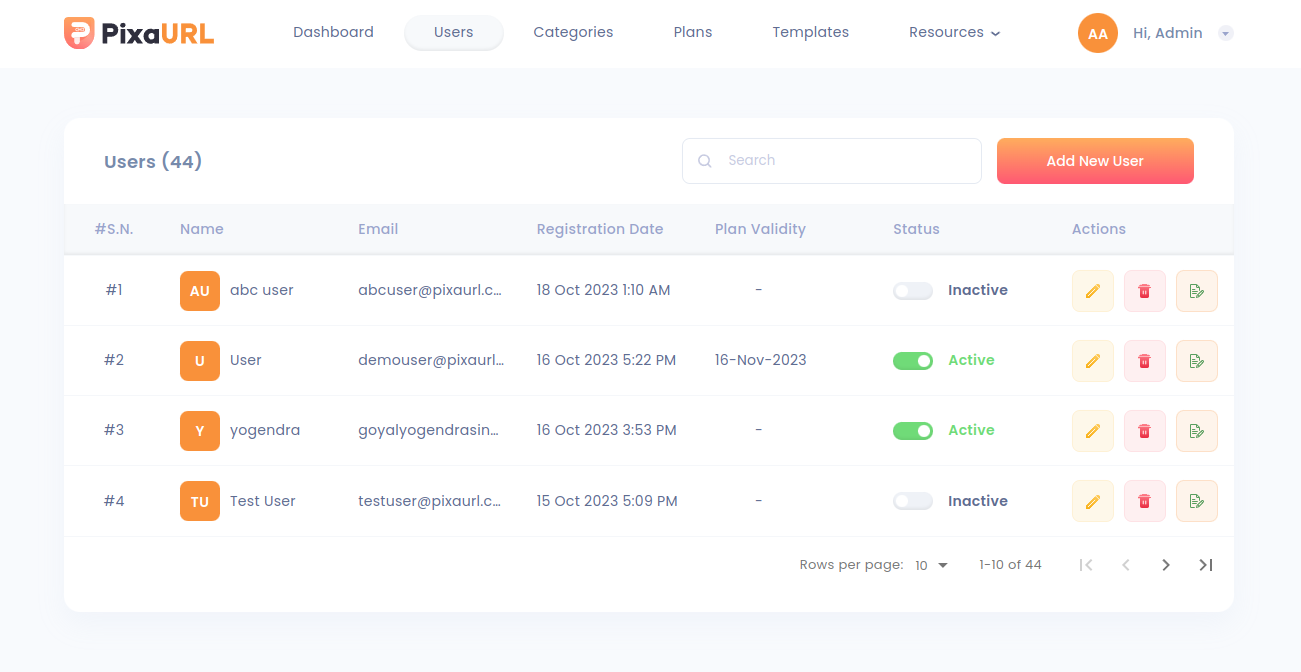
Users
List of All Users.
It will show the list of all Users and the admin can also add, edit, delete and assign plan to users.
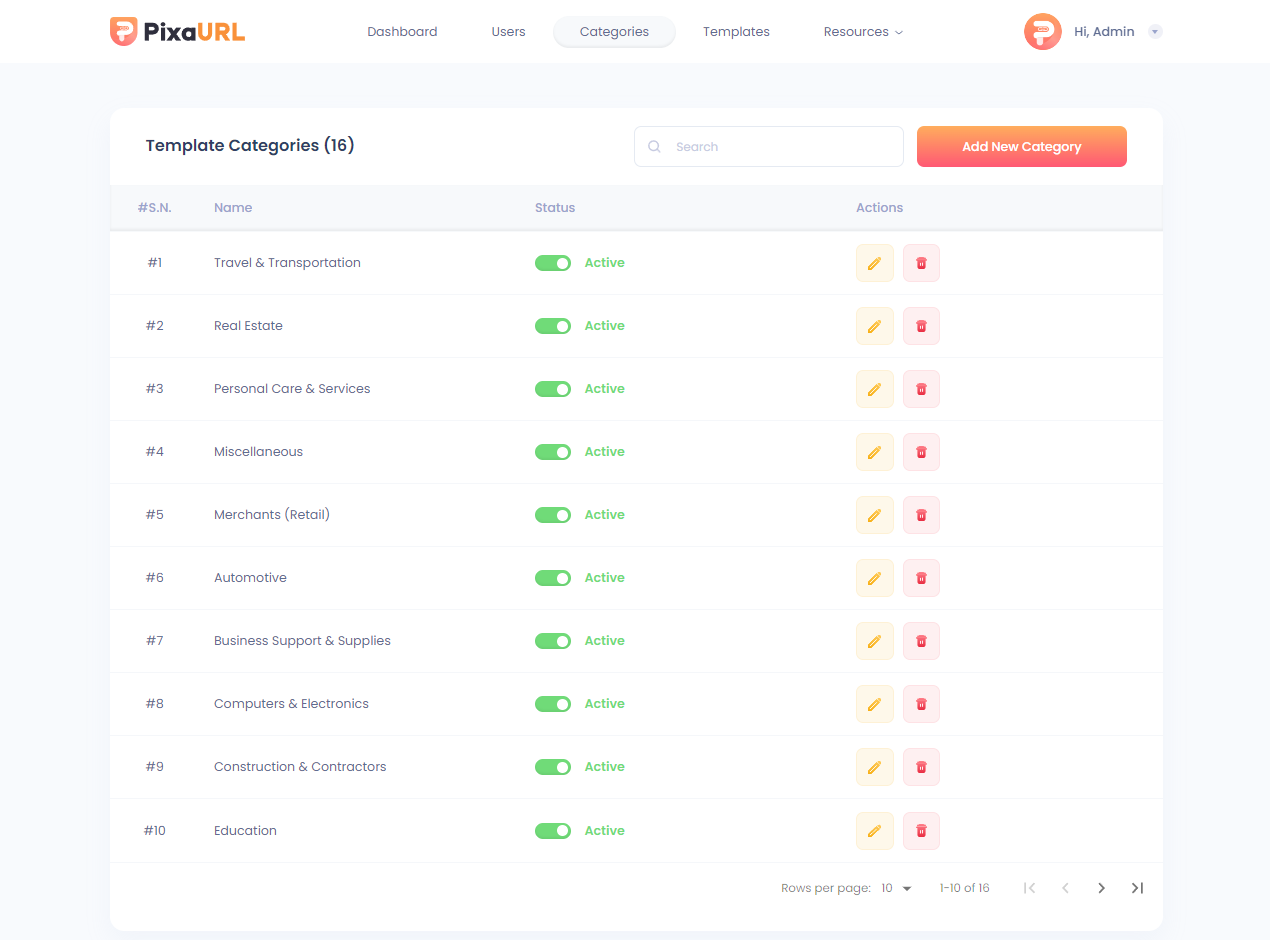
Template Categories
List of All Template Categories
Category settings help you in creating new category and editing/deleting the existing categories and you can manage the category status (active/inactive) that allow you to show categories to the user.
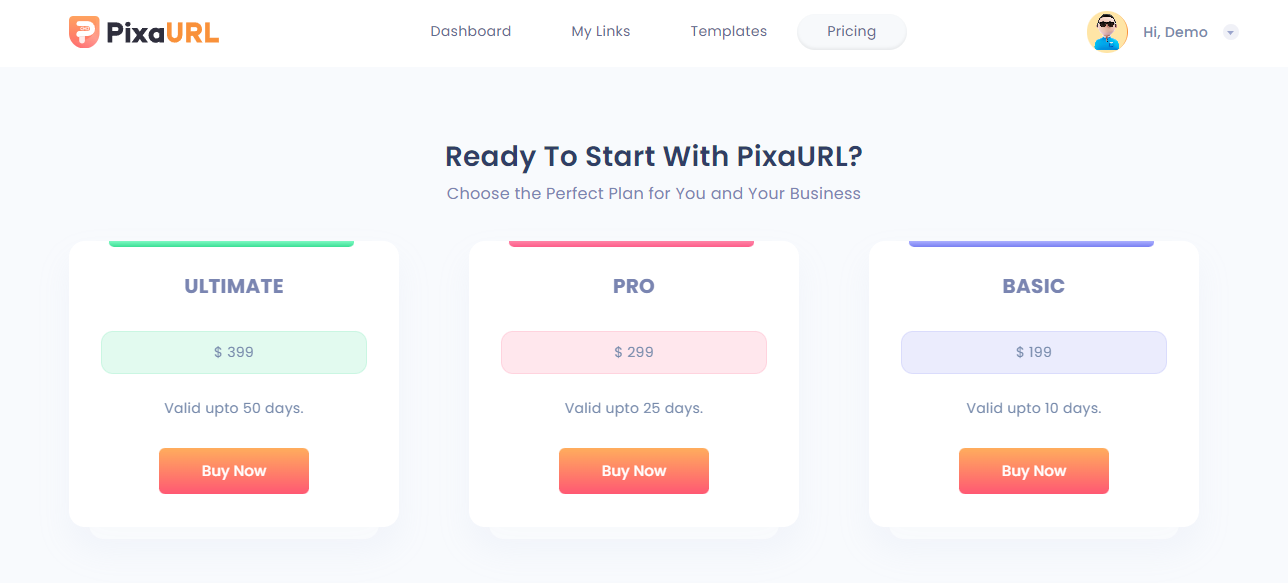
Pricing Plans
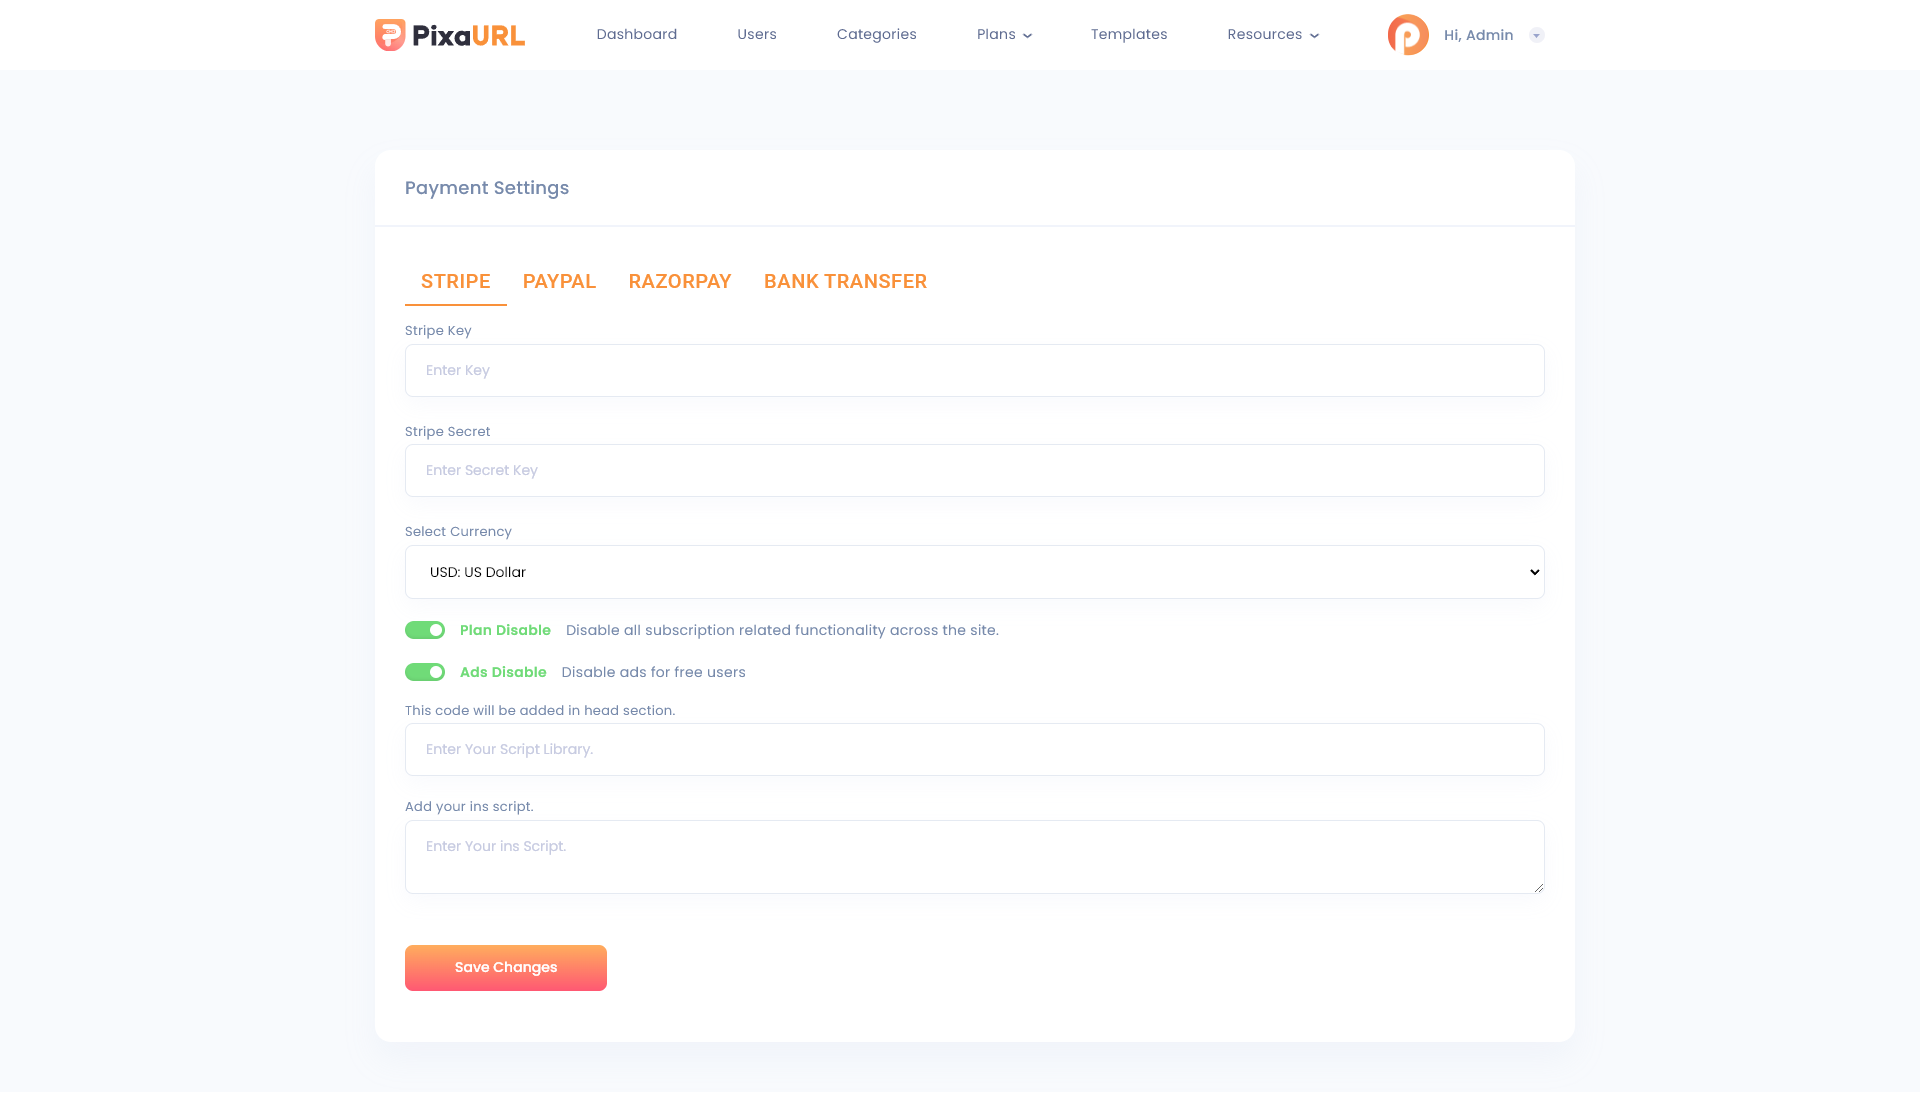
Plans Settings
This setting will allow us to update the plan default currency and stripe payment gateway keys. In this page have a toggle that manages to Enable/Disable plan features.
Here we have another option to display Ads for Free plan users using the AdSense script. There is have two option either display Ads or Disable Links for Free plan users.
List of All Plans
It will show the list of all plans and the admin can also add, edit, and delete plans.
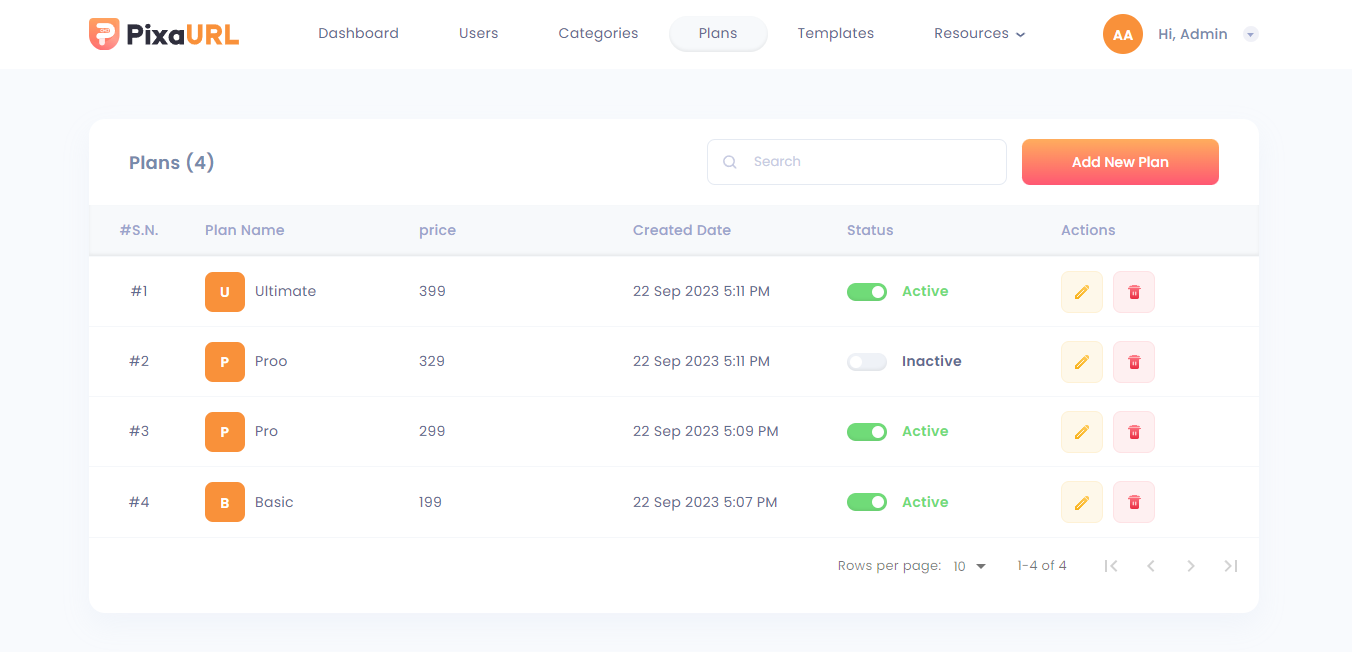
Note: Here pricing plan works as a validity plan for the user's links. So the user's links will work until they have active plan validity. Once their plan expires the links will not work until they purchase again.
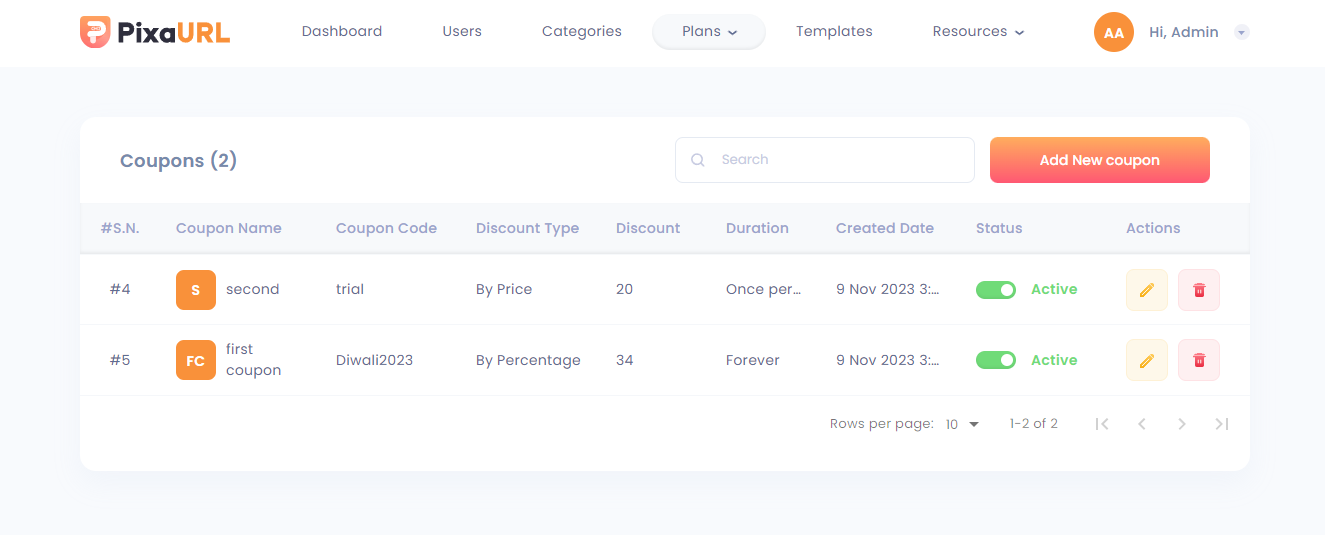
List of All Coupons
It will show the list of all coupons and the admin can also add, edit, and delete coupons.
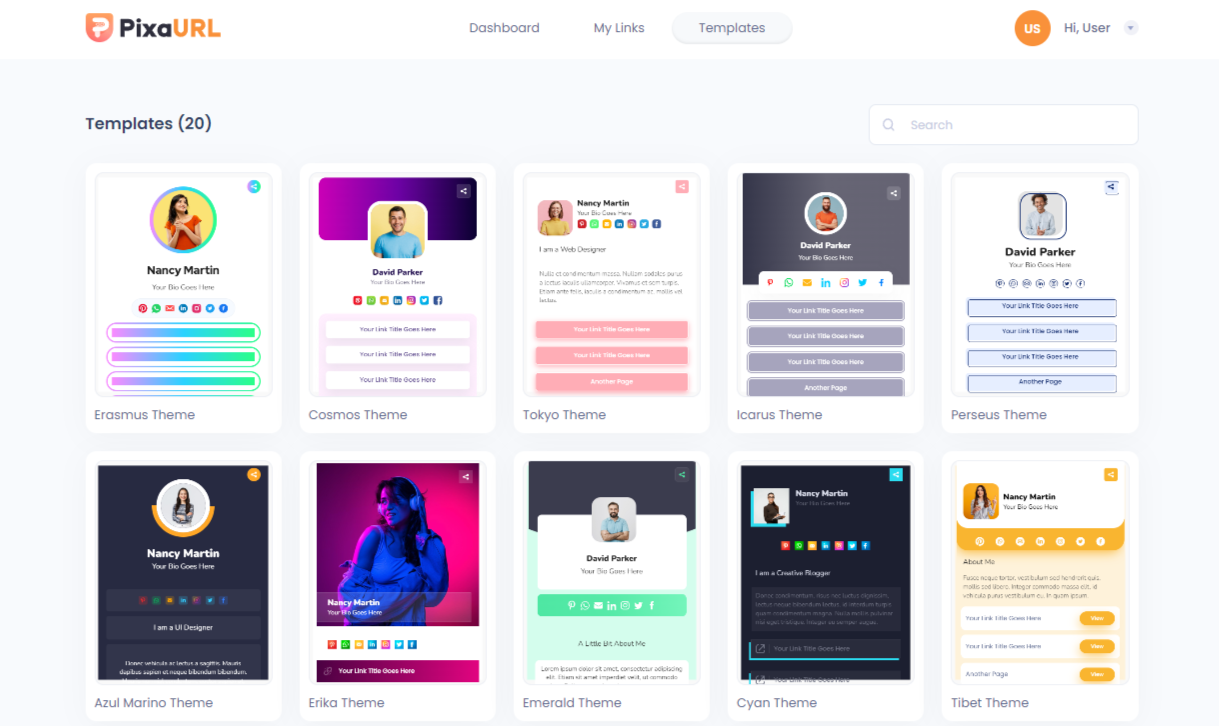
Templates
Using the templates setting, you can create new templates, edit, delete, rename or copy existing templates. You can also filter the templates and get started with PixaURL to play around with these stunning templates.
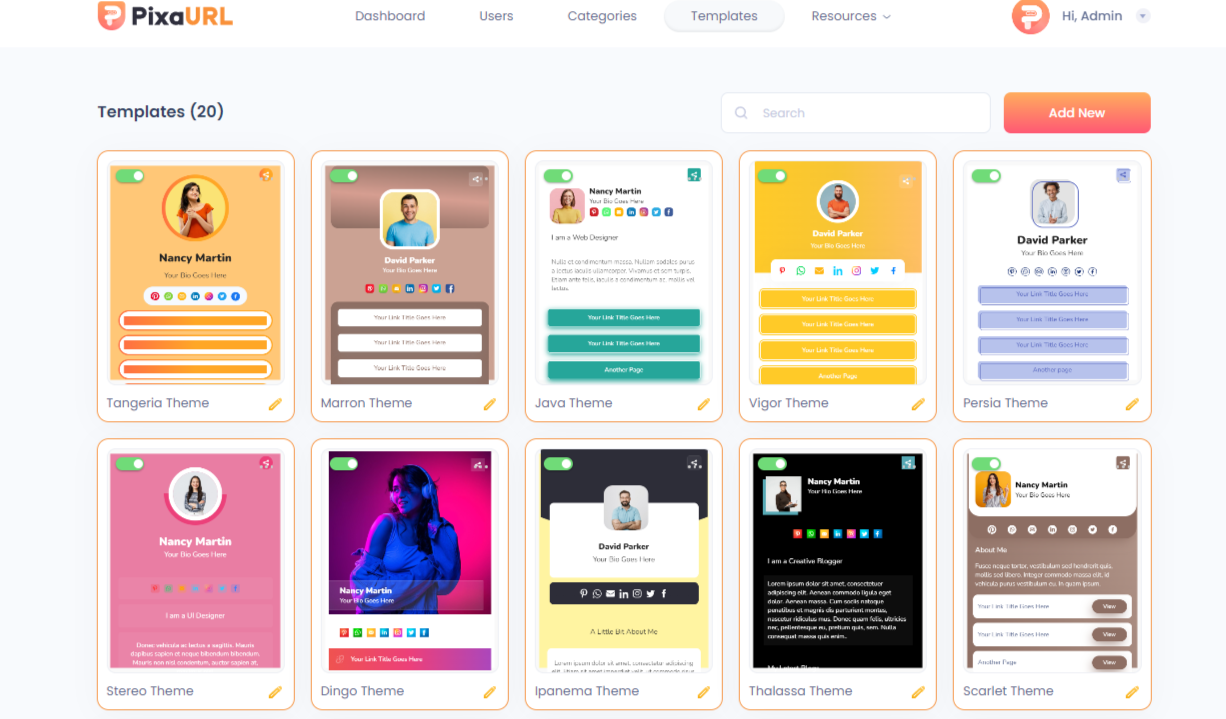
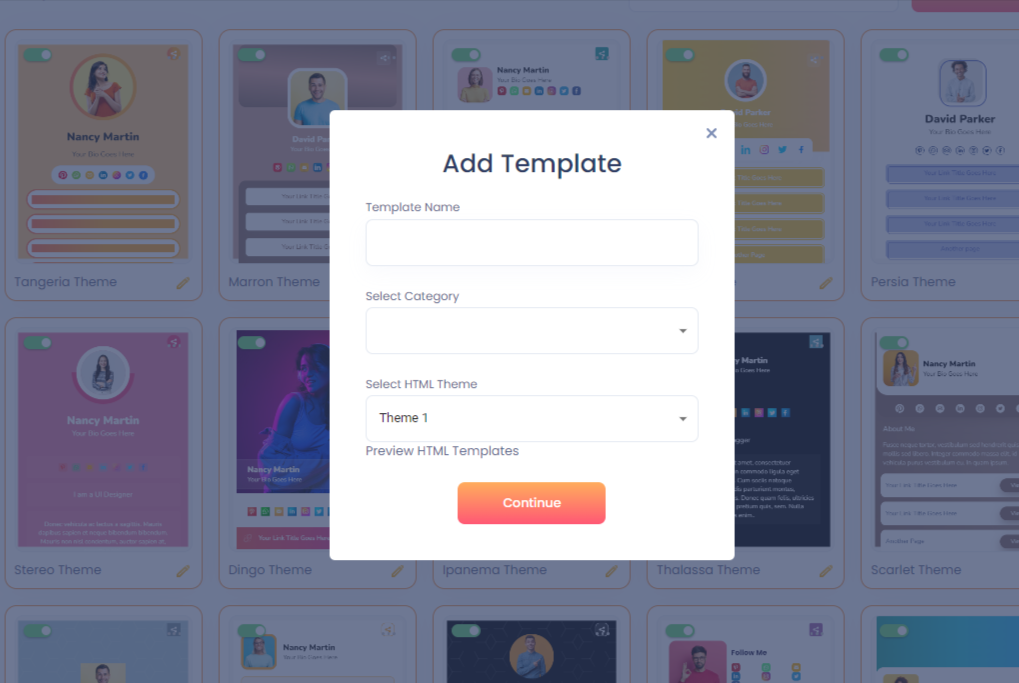
How to Create New Template
1. Click on "Create Add New" Button and enter the details.
2. An editor screen will appear containing various editing elements. You can customize your template with a user-friendly editor.
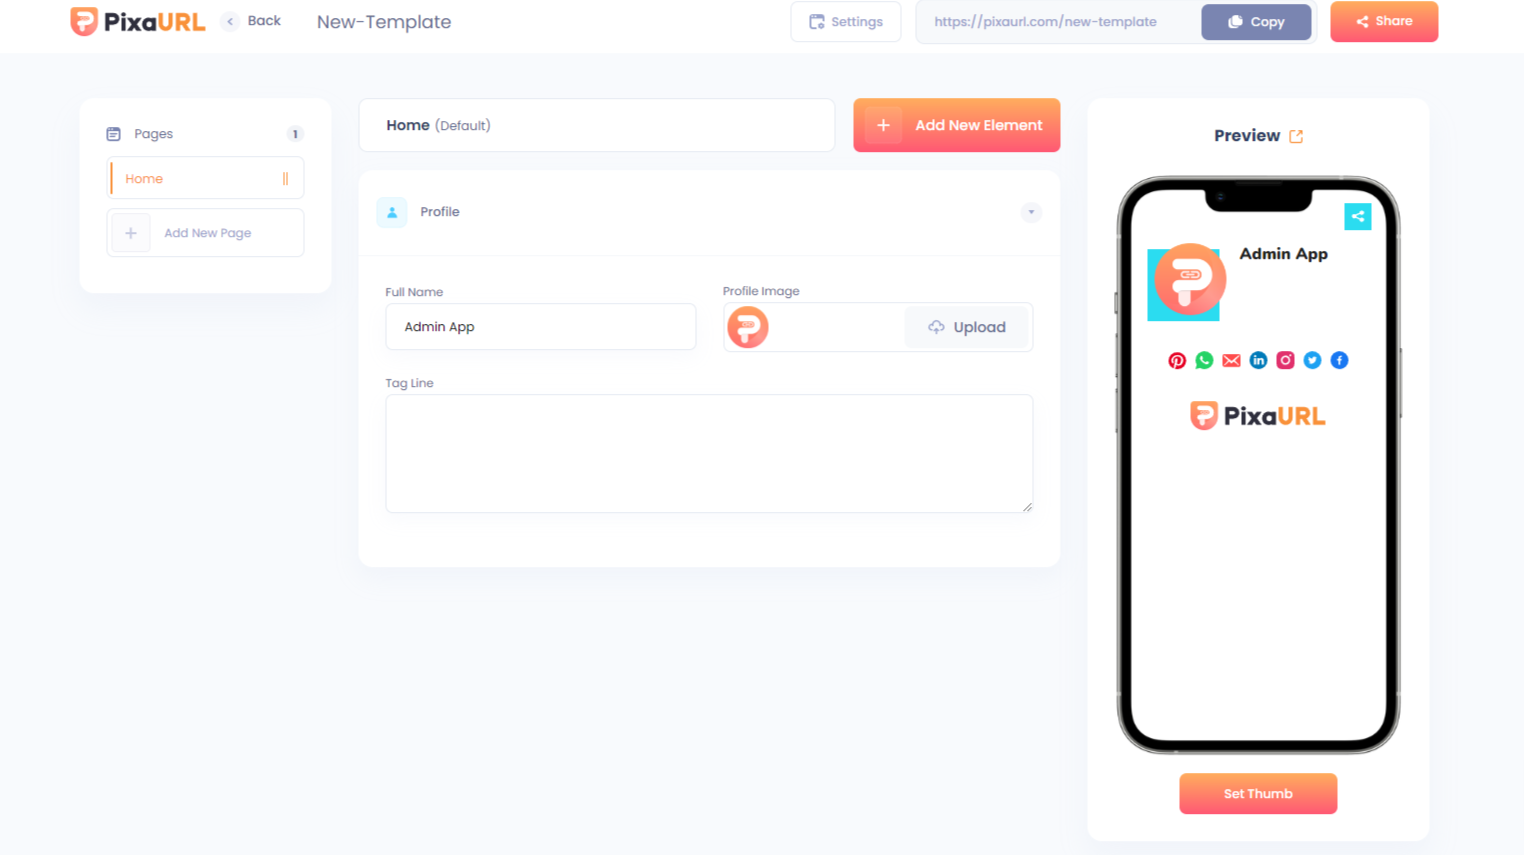
Add New Pages : You can add multiple pages with this setting in a single template.
Preview : You can also see the preview on the right side of the editor.
Add New elements : With this option, we can add the content of the page like (Heading, paragraph, link).
3. Customize Theme
Click on Settings button and you will be redirected to the another screen. On this screen, click on Appearance option. From here you can customize the appearance of the template.
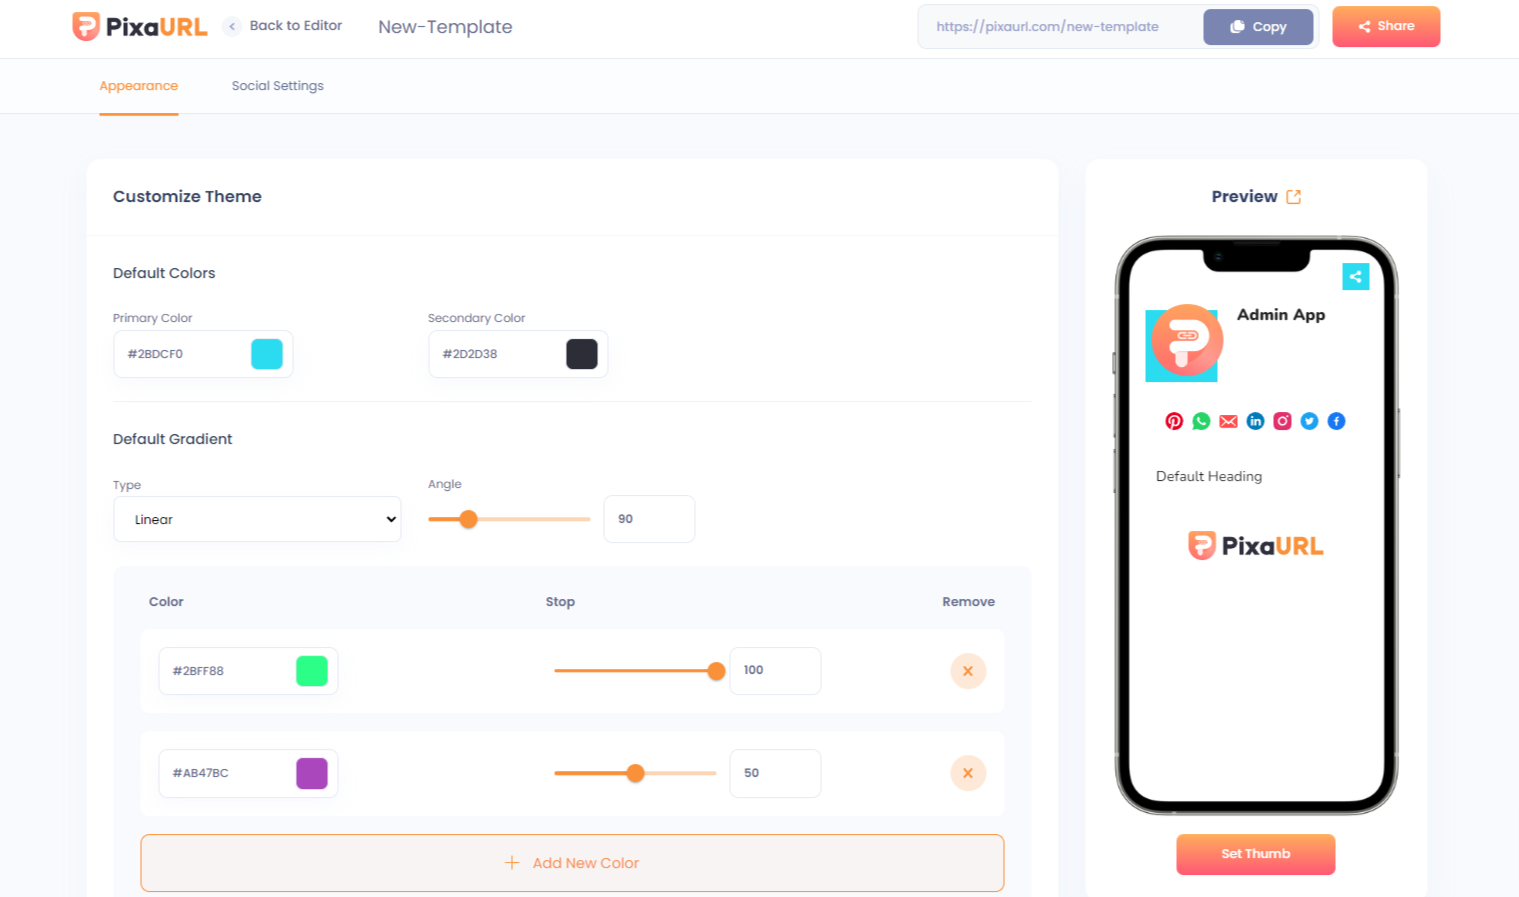
Default Colors : With this option, you can manage the template default color.
Background Style: This option, allows you to add template Background color.
Heading Style : With this option, you can manage the template Heading color.
Paragraph Style : With this option, you can manage the template Paragraph color.
4. Social Settings
This setting will allow you to manage social icons for your templates.
And after making all the customizations, copy the URL and view the template in a new tab.
Icon Management
Icons Types
This setting will show the list of icon types. Admin can add new icons & can edit existing icons.
Icon Pack
This setting will allow to create a collection of icons that can be used together as a set.
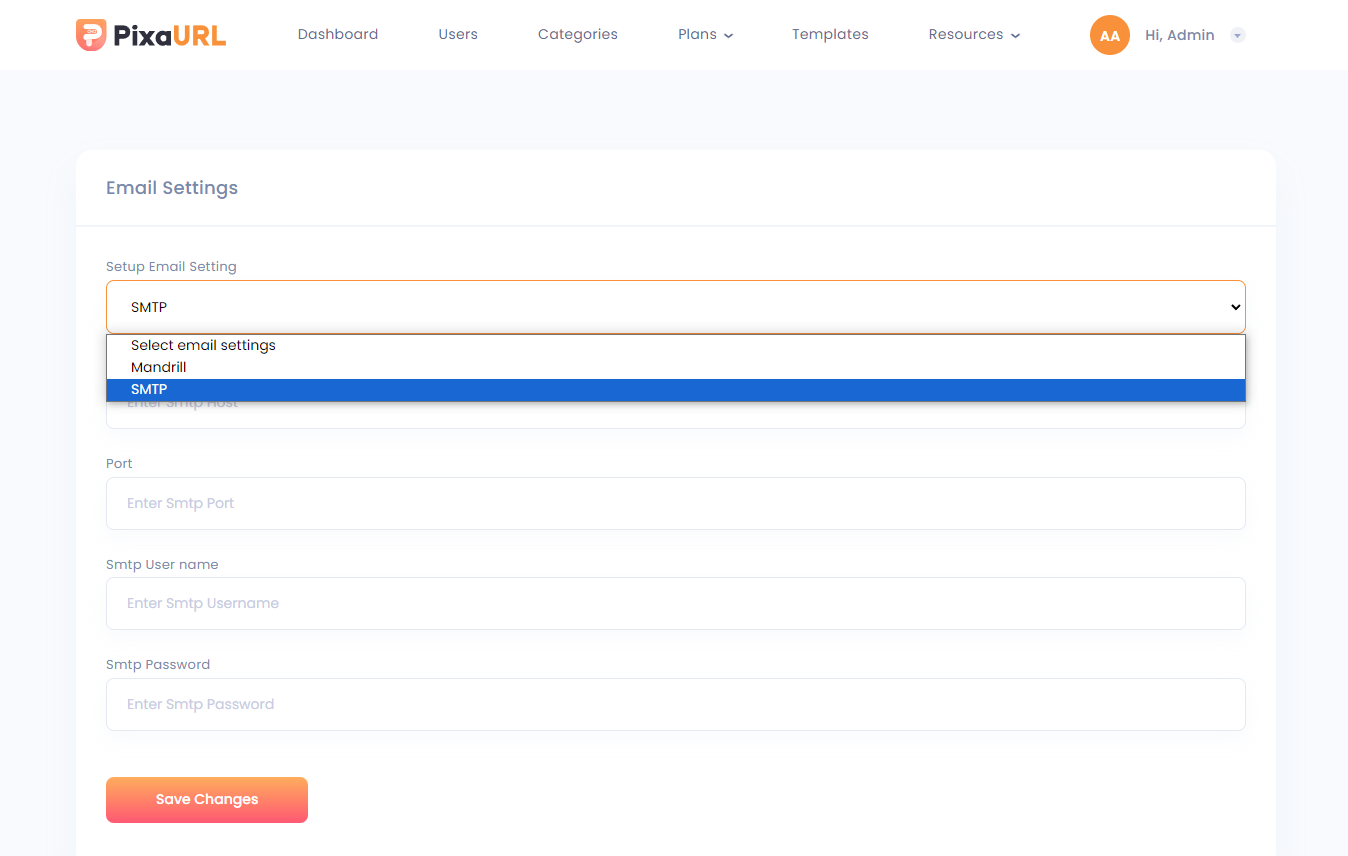
Email Setting
This setting allow you to setup the email provider which is used for send emails on user registrations.
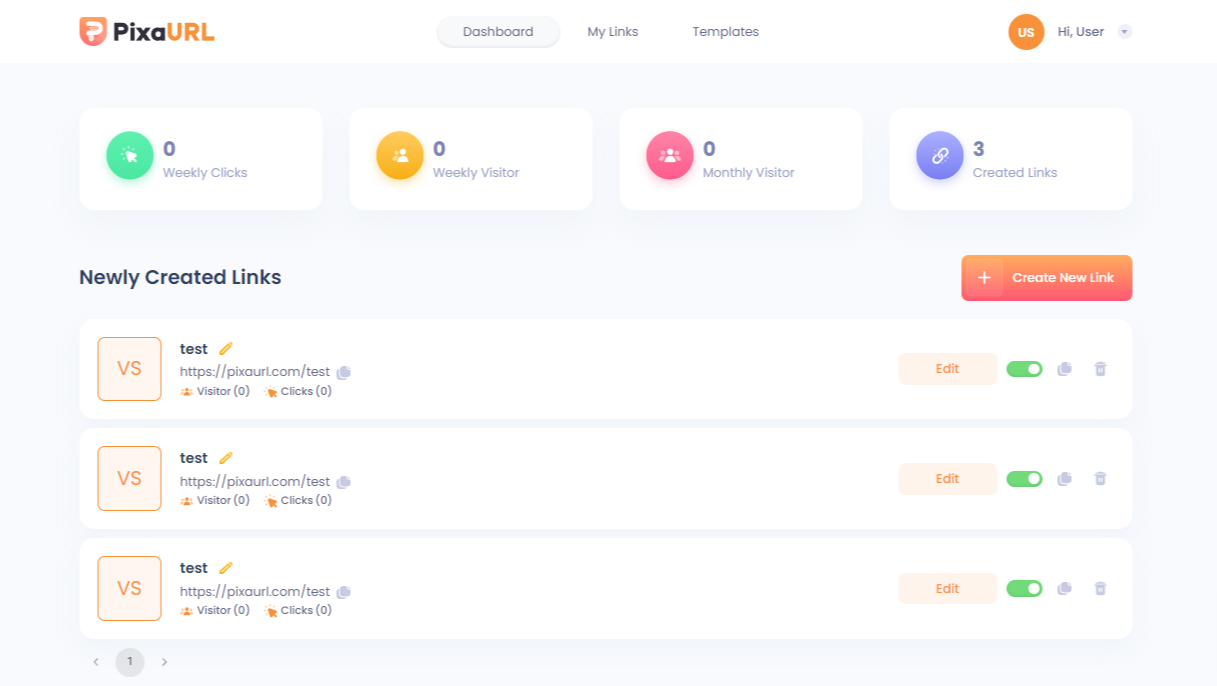
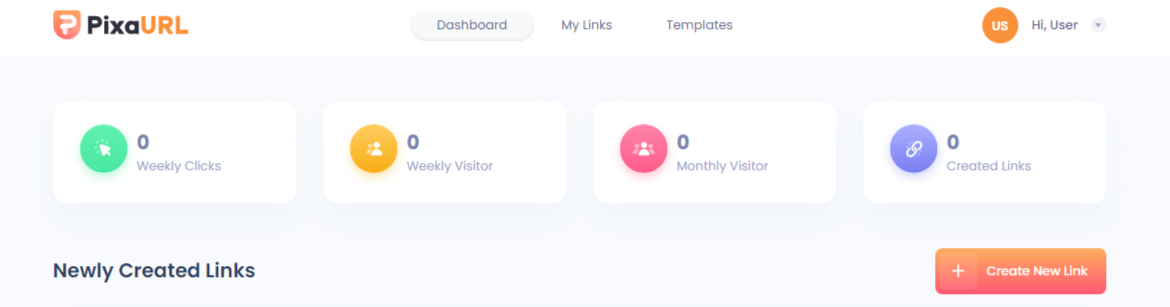
User Dashboard
Dashboard
User dashboard settings contain the counts of Weekly Clicks, Weekly Visitor, Monthly Visitor, and All Created Links. Users can manage the created new bio link and can edit & delete it.
How To Create New Link
1. Click on "Create New Link" button.
2. It redirects you to the template page, and from here you can select any desired template.
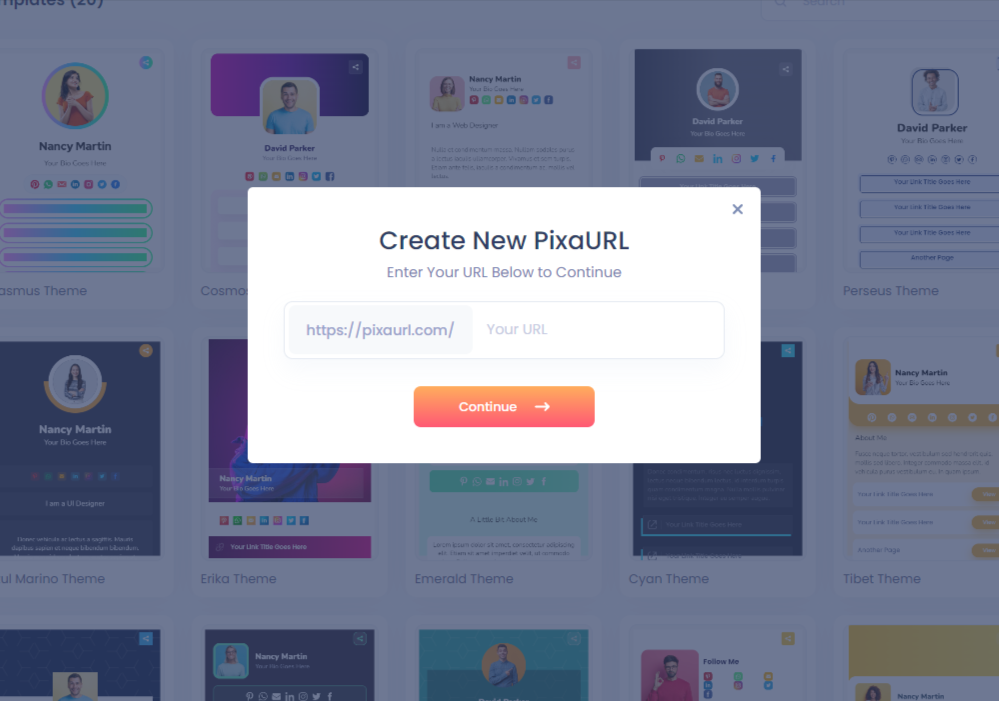
3. When you select the template. A popup will appear, enter your URL name there.
4. You will be redirected to the editor. You can add Profile pictures, names, Tag Lines, and Links, and also you can add multiple pages with this in a single template.
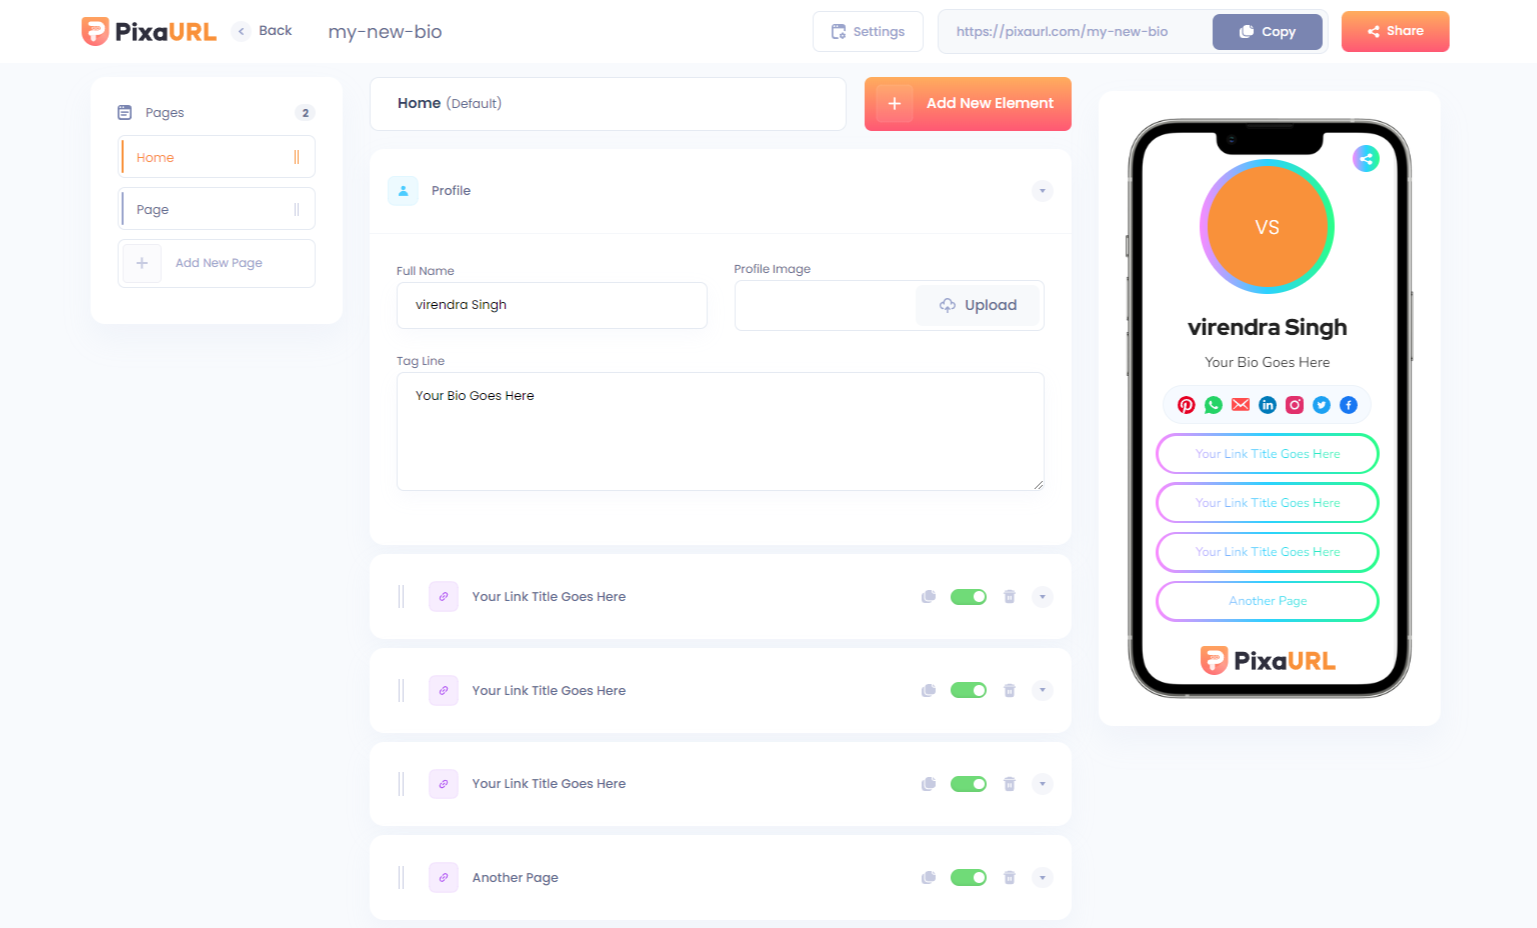
Let us understand some reliable setting options for the editor.
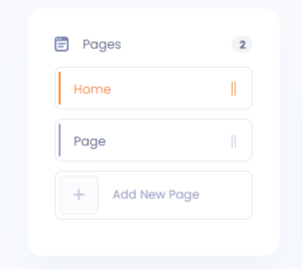
With this setting we can add multiple pages with this in a single template.
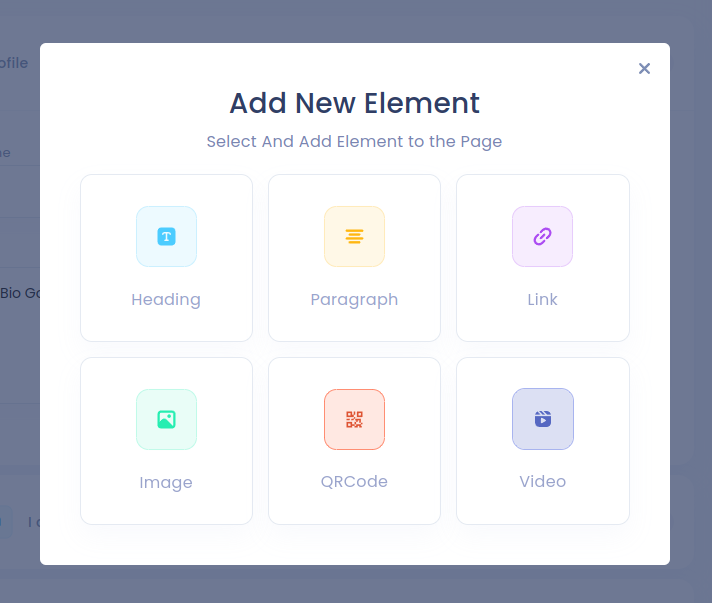
With this option, we can add the content of the page like (Heading, paragraph, link, Image, QRCode , Video).
How to Customize Our Template
When we click on the setting button given at the top, then there we have been provided with some options to customize the theme which are as follows.
1. Customize Theme
This section is already described inside the admin template flow. click to go
2. Social Settings
This setting will allow you to manage social icons for your templates. Also, you can add links to each social icon.
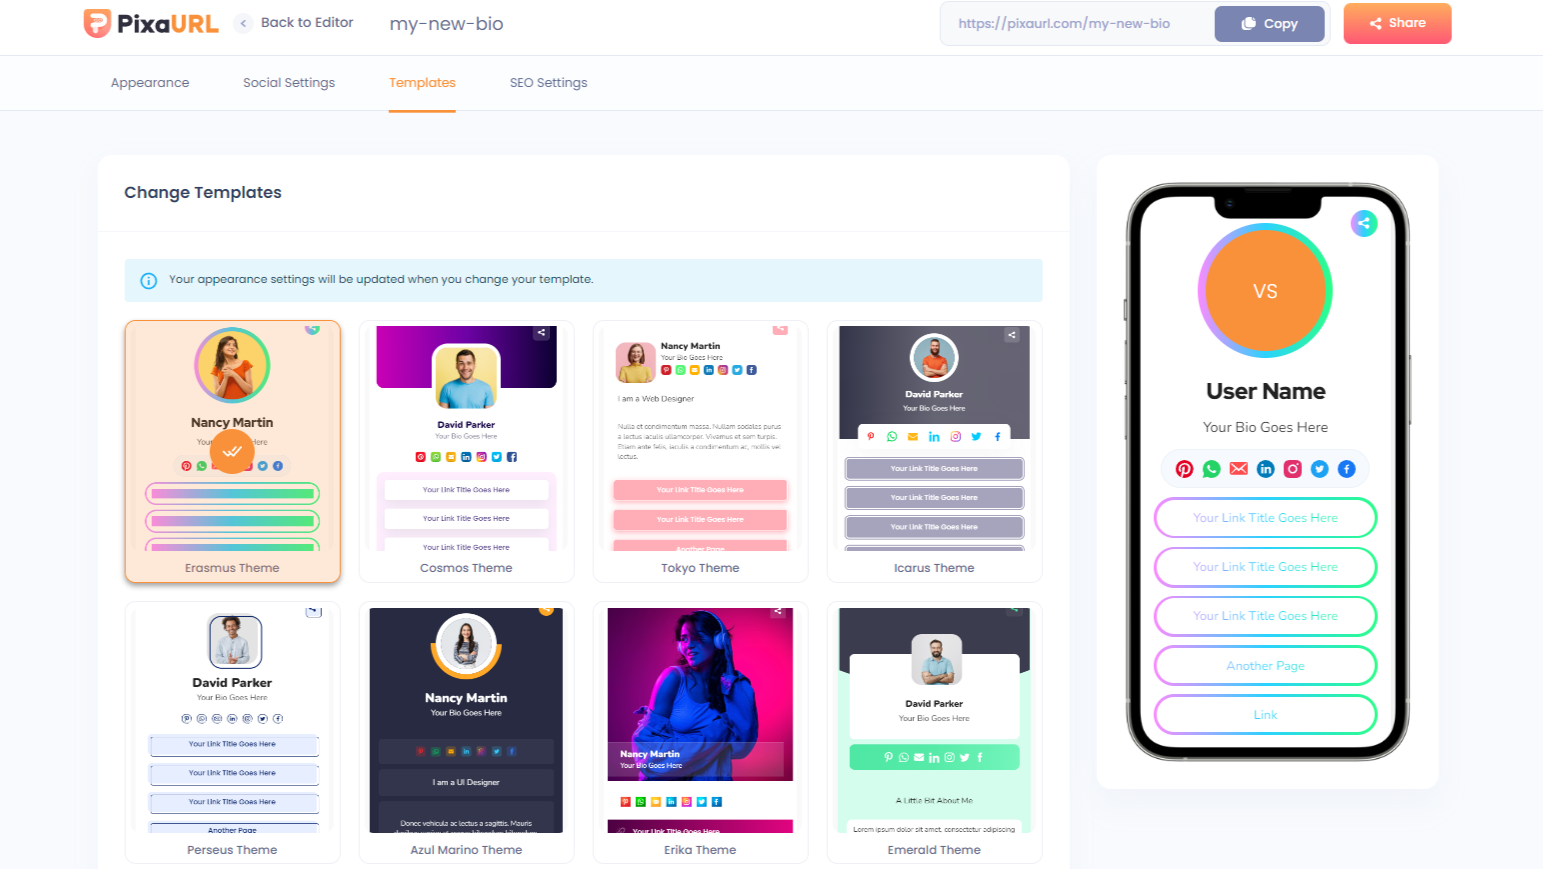
3. Change Templates
This setting will allow you to change the templates.
Note: appearance settings will be updated when you change your template.
You are ready to share the single link with your visitors and get more engagement.
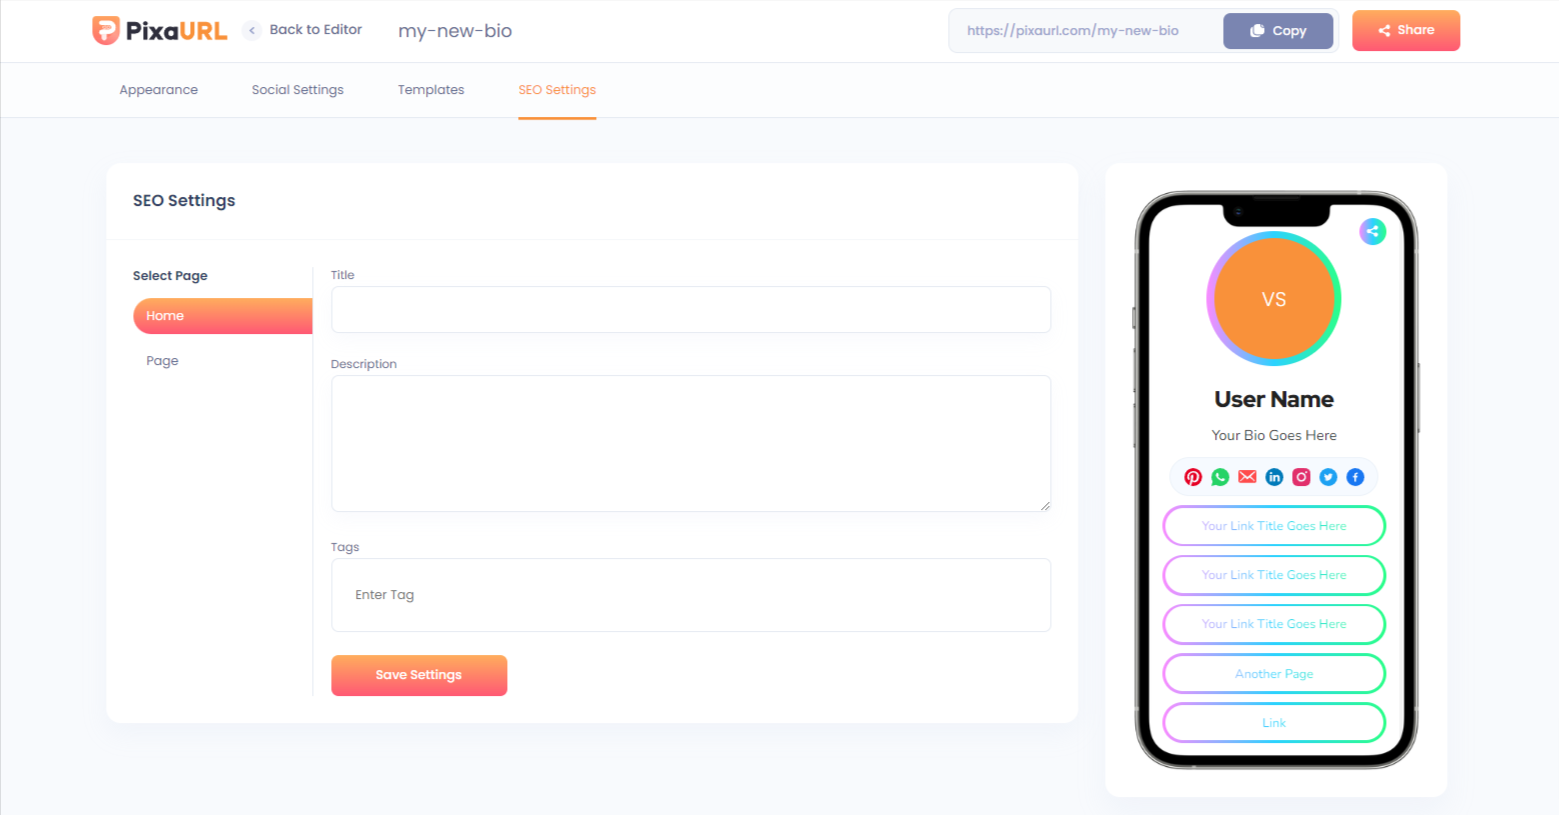
SEO Settings
This setting will allow you to update the SEO field for pages.
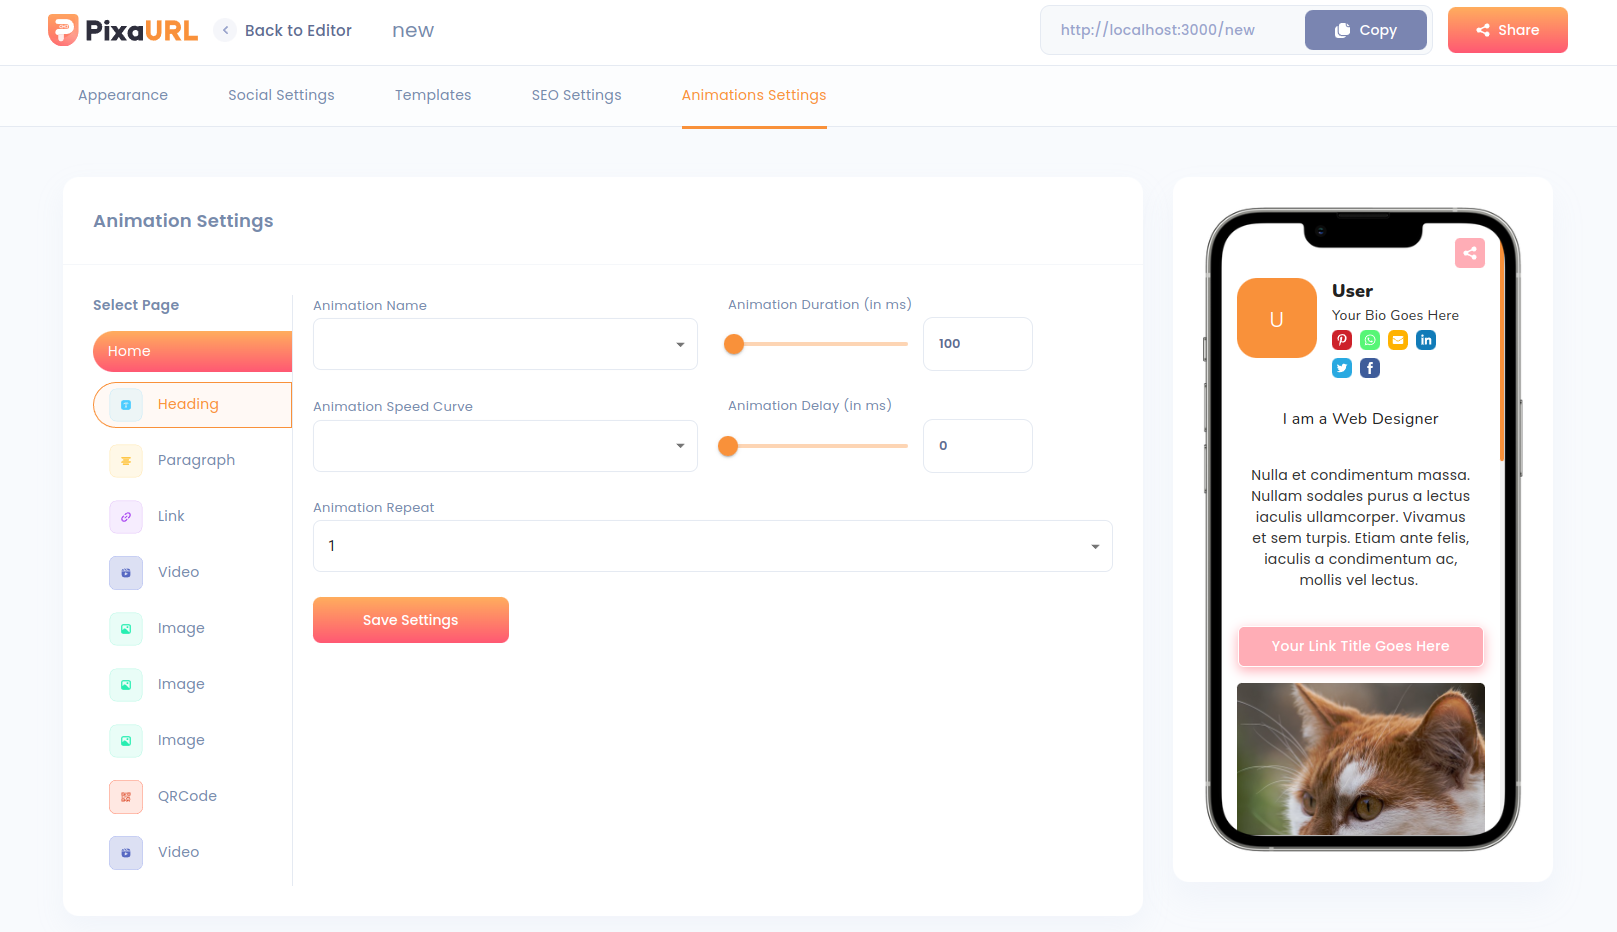
Animation Setting
This setting will allow you to add animation in each elements of your links.
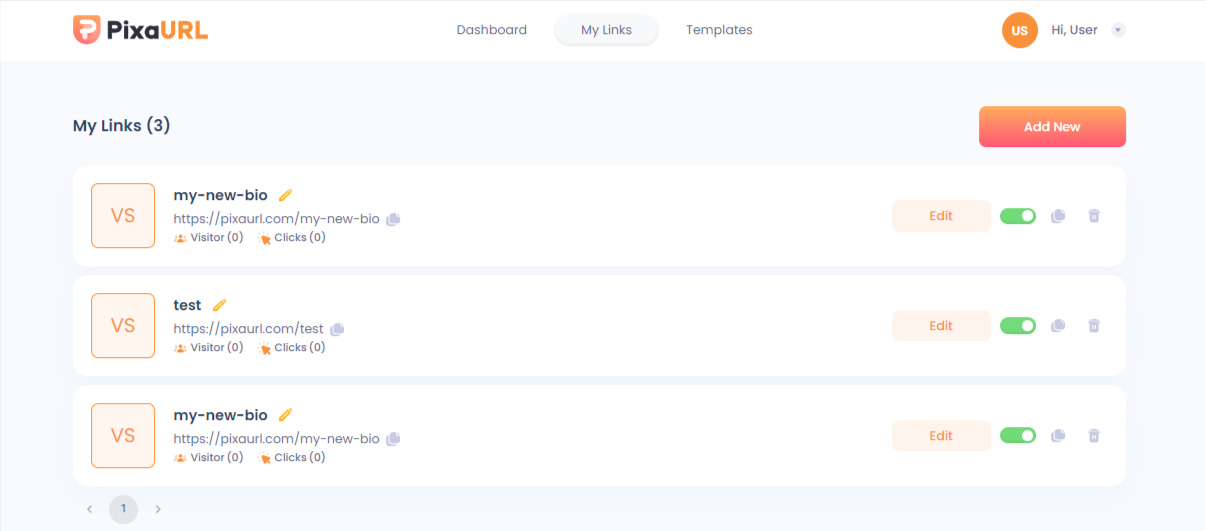
My Links
This settings dispaly the list of all Links. user can also add,edit and delete Links.
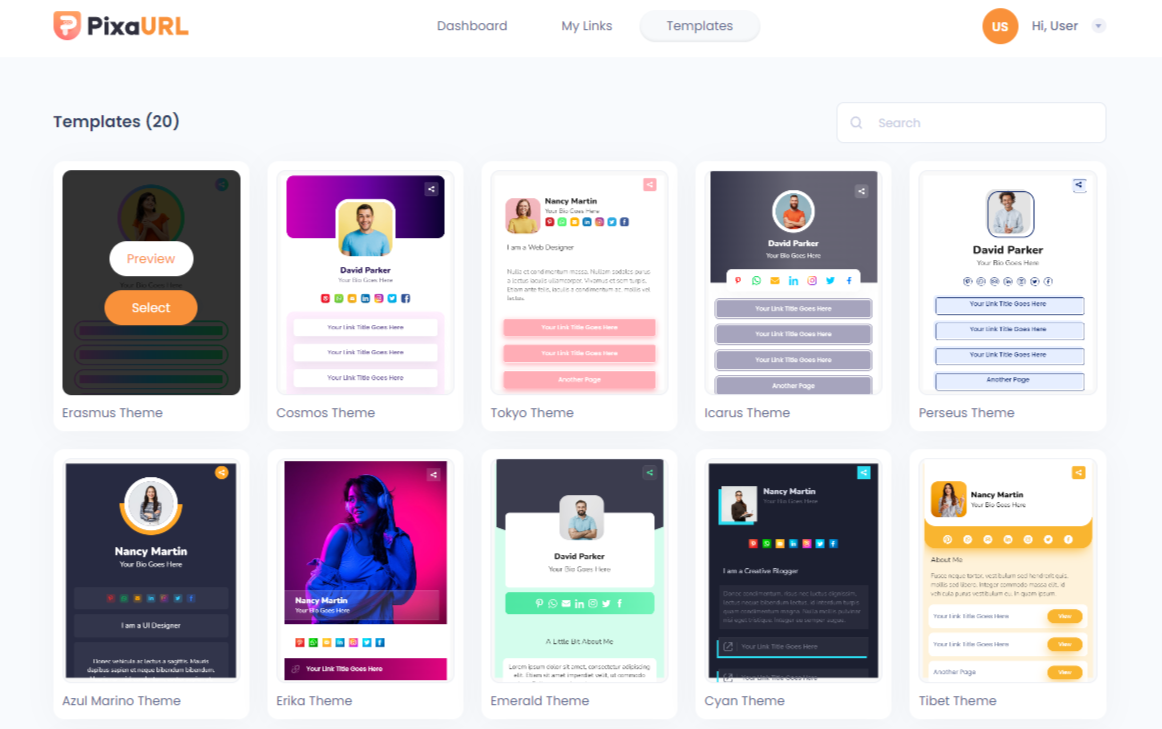
Templates
Here is a list of all the pre-made templates you can directly use and customize as you need.
Pricing
Here is a pricing plan listing, users can choose the Perfect Plan as they need.
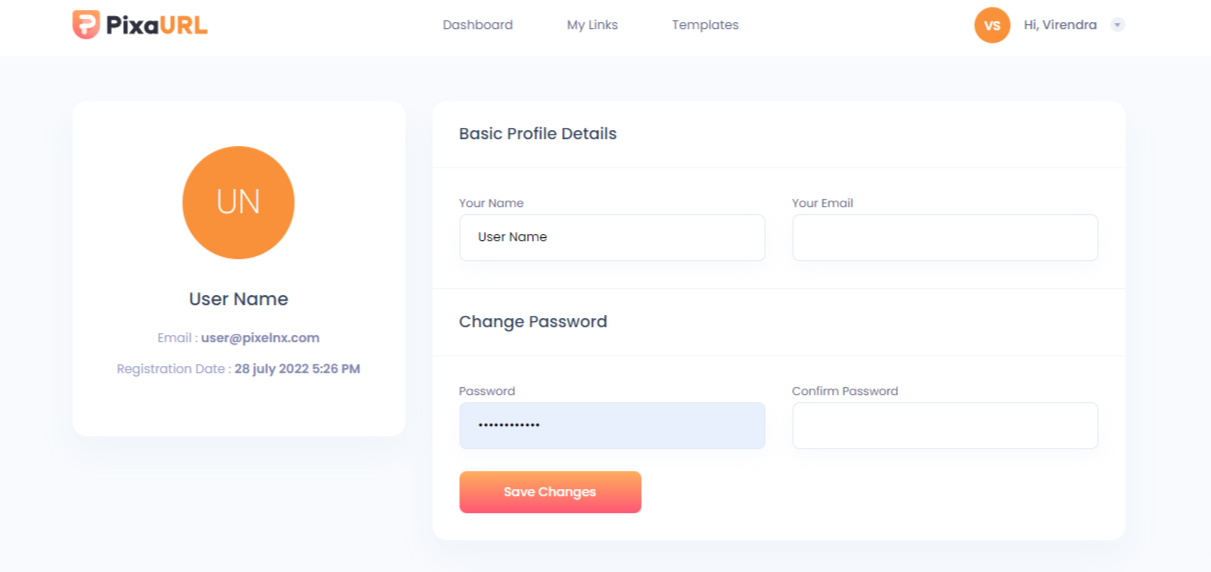
Profile
Through profile setting user can update profile image, and personal information.
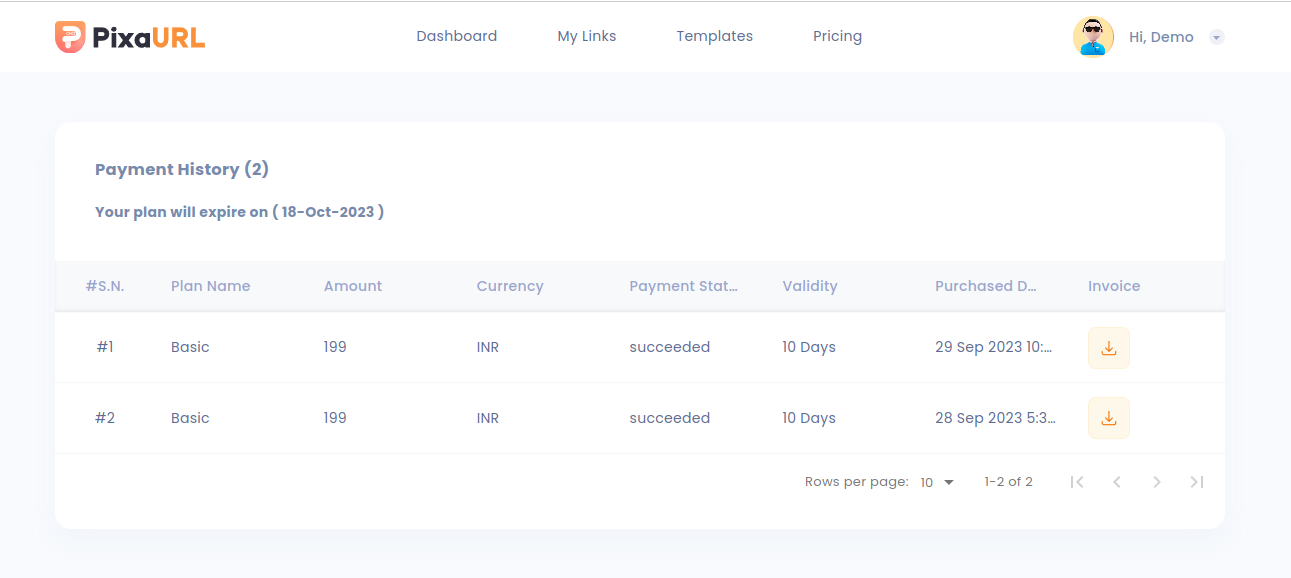
Billing History
On this page, users can view all their previous billing history.
Help And Support
In order to receive a technical support assistance, you need to have a valid purchase code. To get the code, please navigate to your Codecanyon "Downloads" page and click on the plugin download link.
After getting the Purchase code, please follow the steps mentioned on the link click Here to get your product verified. And then share your Purchase code and token ID with the support team.
If you have any questions that are beyond the reach of this help file, feel free to contact us. We will respond as soon as possible (within 24 – 48 hours, usually faster). We are open from 9:30am to 6:30pm (IST), from Monday till Friday.
NOTE: As authors of this script we do provide support only for the script-related features.
Outro
Thank you for your purchase. If you have any questions that are beyond the scope of this help file, please contact us through support@pixelnx.com
Once again, thank you so much for purchasing this script. As I said at the beginning, I'd be glad to help you if you have any questions relating to this script. No guarantees, but I'll do my best to assist. If you have a more general question relating to the script, you might consider visiting the forums and asking your question in the "Item Discussion" section.